1965 Massey 175 3-point Hitch Problems

cabot

Member
Hello, everyone. I have a 1965 175 with the Perkins diesel. The whole time I've had it, the lift has dropped when I press the clutch pedal to the second stage where it stops the hydraulic pump. I initially wasn't aware that this was abnormal operation for this tractor.

The last time I bushhogged last year, the hitch sort of gave out and wouldn't lift. I dragged the bushhog back to the barn and put it away. The next day, I started it up to try some diagnosis, and it was back to functioning as it had before it went out.

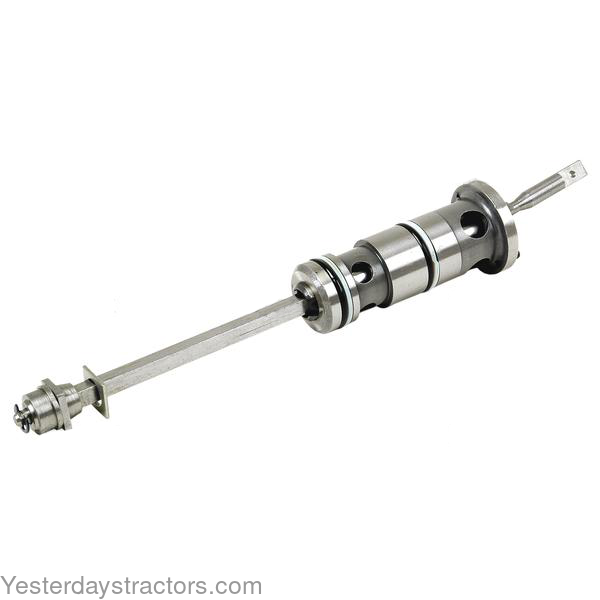
I pulled the side cover to discover that the lift cylinder was gushing oil, so it would only stay up at all if the pump was running. That seemed like the obvious problem I pulled the top cover, discovered that the o-ring on the piston was dried out, flat, cracked, and split all the way through in one spot. I replaced that o-ring on the piston and put everything back together what I thought was exactly how it came apart.

I started it to test how everything worked, and I discovered that the 3-point hitch wouldn't lift at all, but the PTO is working fine in the all the way back hydraulic power position. I loosened the stand pipe cover and initially had no oil coming out with the engine running. After a few seconds, it started flowing out, so I tightened the cap back down. I activated the remote valve and instantly blasted quite a lot of pressurized fluid out.

I pulled the side cover back off to see if I could determine anything obviously wrong, and the hitch magically lifted. I turned the tractor off, and it started to bleed down. I put the side cover back on, started the tractor back up, and the hitch lifted again. I then moved the position control lever half way down, and it stayed up. I moved it all the way down and stood on it, and it went down.

Now, the hitch does nothing with the control levers in any position, and nothing is coming up the stand pipe.
 
Does it have pressure control on top cover did you pressure check pump when you had cover off
Did you pull barrel off when changing seal on piston
And what did linkage look like were
Rollers in good shapes bushings etc
 
It has draft, position, and pressure control. Rollers look fine. The linkage is maybe slightly stiff but seems to function properly. I've determined that the control valve is sticking and won't travel through the full normal range of motion. I'm close to getting the pump out now. I have tomorrow to work on it as well then my next chance to get where I grew up and the tractor will be be mid June. If I can get the pump out, I may take it with me and work on it between.
 
It has draft, position, and pressure control. Rollers look fine. The linkage is maybe slightly stiff but seems to function properly. I've determined that the control valve is sticking and won't travel through the full normal range of motion. I'm close to getting the pump out now. I have tomorrow to work on it as well then my next chance to get where I grew up and the tractor will be be mid June. If I can get the pump out, I may take it with me and work on it between.
I would just put a whole pump in it. They are pretty cheap and seem to be good quality. Its pretty deep in there to get to a pump.
 
I would just put a whole pump in it. They are pretty cheap and seem to be good quality. Its pretty deep in there to get to a pump.
Yeah. I definitely want it to be 100% since you yave to split the 175 to get the pump out. I was thinking that I was going to do the ~$230 kit on the lift pump that has the valves, chambers, cam blocks, seals and all. It saves some money verses a whole pump.
 
Well, I got the pump out! I'm going to take it with me and rebuild it before I come back over here next month.
AP1GczPHIkPLC7-5CWcLK-eQg6FMN9gJW6Ud-oHkIwm2RpnlY01YBGkY04NUtZ2iEXWhKV6IVAE8L3ztWxjubdpRqM73tBbBcSSbci5C_1phzZ616flmf0vMXQPQdwhBsXYcuiY8i0d_f9hTHcv_5Rx_knxUig=w1081-h811-s-no-gm

AP1GczOKAjQjeE7F21bmuCyPI232mLQnesP4pMYw22A5x-UbbpTOf8hXMjrp-hvbZqzSsPG2WmhoYwTb1m871G1TVlkhBPcI35BmYGC2Or2hI4u7fogsq3mNfWJJdqwTGmm70_wDNhMyM_G6nP5L-5y1RCgdFA=w1081-h1441-s-no-gm

Also, I found this little sheet metal cap looking deal lying in the bottom of the casting. Does anyone know what it is?
AP1GczOpuaiYnO-8y8ofdxtIqqSJ00_5devIVSKZ27gJAD3u5tf0lR-4wUrLU2dpGDnAagHSbxj7biq7aGmiuQsDPPIGSoN1TmSnGsLiHSuwShd2lLzvvyGbcUmUVS493eZCBK2uztCE3hu872FU5zZWgCkdFQ=w1081-h1441-s-no-gm

AP1GczNg4EZi5GCtid4-gtUSAiykU2_kuvJj2AdGMPZc0wwI2iW6QFMn5kxASUixHCMLI8CFVHzKjNCTDaT6vwaWJnXLW6eSNAIjtpLtQ4J8r1_q_PR-67QUCAuIVt-SkFw75gHgfbtrucamtXLIYZ6pTNKC3Q=w1081-h1441-s-no-gm

AP1GczOHpcgCxG1mMSFqEkc7RSdK6cHEhIay8gKf9GsHIec5DaVWOrhI9zMP8NfmN9POBCpIKBE-Mzrpbv2zvCvcla8WlQpceINNwbeRD0YGbf7AE8k4k3HSoizEtziAsEdGyRQ5dA0gEjyMh3onIRcsoISPJw=w1081-h1441-s-no-gm
 
Last edited:
That little cover was absolutely the bottom of the intake screen for the auxillary pump.
AP1GczNnt6N6zgjENsNxUdzH49NueazeZ5lUidXrtPtRJo6DD-QQLW8w90cVmFWnzBtPOWzgC-OuVIsthd7Qrb3B_nZa0lahii2benD71U75LKoGwipDNbdHW8jXF6j_pnyPo2aCXt7ZDDZvpv2AFW-iSYFDsg=w1081-h1441-s-no-gm


It looks like one of the few things in here that isn't available new but also looks like not that hard of a fix.
 
I got a chance to tear the pump down today. The rings, bores and cam shafts are perfect. The cam blocks have some wear, so I'm going to replace them.

I found the problem with the control valve. I made a quick video showing how it separates in a place that it isn't supposed to. At some point it must have stuck, and allowed enough force applied to separate what I think is supposed to be a press fit of the drive rod into the valve spool assembly.

You can see in this picture of a replacement part how the assembly doesn't separate the way mine has. This seems like the next obvious problem, so I'm replacing the whole assembly.
wml_1862486M96.png


Upon further investigation, I discovered that that the valve body through which the spool moves had come apart and that it was stuck in the bore in pieces. The first larger section eventually moved with pliers. The end of it was stuck in the bore but came out with some persuasion with a drift.
AP1GczOmGxmDpnQOrtaH8OVYojT7FMvMPm60h_J77SJ_lZjFECl8m9bpiVhzNQ5bEEVNSgtFEu1PILImJj178WSYjZaJSuQ5hCOuSAMh01G5plCPhvVHBsZvXWVQowYNMi_ZCUr0TS2rbMQ3JFfb2C3AE1cg0g=w1081-h1441-s-no-gm

AP1GczNJggPpd_LIedqYcwUyfFCCLv8iwpvo0iX6NgFIW2z6NSWPSOMOkLpjI_FJOQIbgyjGjNUP_gsifB3lRNqIaRYJg1l3K_C0jVBjzi9xc8H_OO3jEb_kHQyCT7Z_onw1siAR6NAjUfXarQnfIRtFTcotcw=w1081-h811-s-no-gm

AP1GczOwjb94Mqak0RDKeMsenxHeZqfN9e8JEWyZpnkWOKl37R0KdrLE3Q6iucktpuzFzyoJ1hcSdqoO85PzJ1ceFMCdpU55NdxE6ptmzBewVVgDo4TOz06NWQatqnZIrL7g7X5qG_nkyVl-P6MHjCGMD4VLqQ=w1081-h811-s-no-gm

AP1GczPKrXkwVnvc64mCvImpItCZvji-H3m2IiTNATobPkYXg2g7YTOseeul5R-t_StdxDCSkdFaodxItiSWEel3vOcb6v8Gcq9a0irLNKB3uuUdvQzXXZ6_PMDWw6fuSQXLffVkJdtcyAFTiLVhVL1iUb6a-w=w1081-h1441-s-no-gm


Here's the assembly laid out with it separated where it isn't supposed to come apart:
AP1GczOPSZjodFc786oWpn_YOqgERJ_nCRdVMUWlYfhMHDALjksXxnIkJv82D4pKupVLai_VwUR0tsNkr4IZnc5LD0y6O1_dZ0Cb-PwrPF39nf-VgXXxlPil8bGNlQ9mDGlk0fJkZvjCkV2-pFJ02kS_o_rQtg=w1081-h811-s-no-gm

Here's what it looks like assembled as it's supposed to be:
AP1GczPzJtL6SKIK7Y_VdGEpCSpweq2WYqjI-zKrhYRjdJkm7UyzJv_iWzn0YxiUgNI3LNKRAyzLmYWqPeHfjBIAogEyT0LYOQ-2la2WojElJUYTtDyT5I3SRDGRwcSgPUY04RZODhCj-1rlxp0yUhc3QBDqPw=w1081-h811-s-no-gm

Here it is with the oscillator assembly removed. This is the part of the control valve I've ordered. I believe the correct part number for my tractor is 1660209M92.
AP1GczPrfCUSxWNX5ktlOLbi_uFPtoMb62AlCUHxflmXG2Qhcxv8Bh1kBpeG_WnrLYzDS0CYNoODouax0XbKHKueCrFyx_r5vr11IJYH-oHeym2hZDE0C9tNYd0k1Uwy5DiEt6ZYFFVJVpAVXBVewDyaS4a2Pg=w1081-h811-s-no-gm

I also found the rear cover slightly bent where the actuating lever attaches, and the intake screen is trashed.
AP1GczOKfIytTmMOQa3msu7TbbIrkzDH1IK4dFeEJVFpZpgVs5J6V7iaBSo8mywEhf-LZqVxK1a4fSKTbhHvovhE0N22fpnk7bPybCD4FJPL9fqTGsDR5QmCyt8zIh4fIUmP67Nqd7WB4w4EvJ71RqBo21DMcQ=w1081-h811-s-no-gm


I ordered all the replacement parts tonight. It looks like the control valve changed several times over the years. I hope I ordered the correct one.
 
Last edited:
Okay, so in the video the control valve spool is bad and fix was to replace it with one that works.
Yes! Prior to disassembling the pump, I knew that the pressure was not passing the control valve to reach the stand pipe but hadn't found what was physically causing that. I'm satisfied with control valve broke in the middle as clearing that up in my head.
 
Last edited:
I ordered a seal kit, main intake screen, new bronze cam blocks, a control valve assembly, a relief valve, and all the gaskets to put the tractor back together from Yesterday's Tractors. My stuff came in four packages, and the seal kit for the pump was in the last one to arrive. I rebuilt the intake screen for the auxillary pump while I was waiting on my parts.
Before:
AP1GczNbOrR928pLiSe010hd7h9NwenmfyEHNZubodHKeWIvmAByFuUungXP5tU0Af_VLIDsuL5ovlTwQeMrRIoCBs3xLNQYGdoXjO0ASxpt9fFEIQT3TzwrGDOYR7GXXwiXlvP9MULEtwZFjRVOZMv5-HN--A=w1081-h1441-s-no-gm

After:
AP1GczP3h43QnE1qE5yHoyRObJirJB5KOEGFDQvIpUcTT_9NyCr7UN8RmFtyYXUZyE2mvbAJqXPvDSJN7mJiVTPBvkyIb5USLjmmw7_O22RpSLVmb2isgnrn-uD8Bmq__ULBd5Q97OurLBFO-bujL0ywtJkuTQ=w1081-h1441-s-no-gm

The last part of my order came in yesterday evening, and I rebuilt the main lift pump. Here are the cylinder bodies with the valves removed. It was neat to see it all apart and think how the fluid is pressurized by the pump.
AP1GczOGG-24g7JWgJFAT09Wb_yEeLUcqNIWesyTTujUJKcGi78QdbhJqNKyaGU9vA68CWQmKtJHw1Q-i00XOGqEWk7ly-u7dm8N7ub4qaMazFVB6DCTwrxViXQovG03XF5c__CHZaxWwPj55X78odHSgZh8cw=w1081-h1441-s-no-gm

You can see all the part numbers for the stuff I used to rebuild the pump here:
AP1GczOQCQ9Hhw9DJhHlWhtdLYQu-OaRlUqhydlmhzLbtRhGcJkS9f35hGfOXYQQELvigF2Ws6S3wQaWqmfbwXqPRgrrgxEvS2Nb9ttVk_aqif8pAgzj3JVAtAyiMmgscISNyAZ5NwF0RhAUGwSl9k-q_BZQeQ=w1081-h1441-s-no-gm

Everything seems to move freely. I can hear all the valves pop as I spin it by hand. It'll be the middle of next month when I can get back to where the tractor lives.

Here are the valves reinstalled and the pistons in the cylinders:
AP1GczMN2ygGTu48CFcXKBC0gOi6OgkVNipE1iUdwM_fhU0xoIrbQpWCgpuK_ad_VHhs2k_hbSAwSmJ9r8HsvmJ2YrDZ11CTzNXFp0kmYf7UFgyH0O15VeAe4mllZqXrIPcC3CMm6GzngSlqDaz3MgxH9rMjog=w1081-h1441-s-no-gm

Here are those married to the main rear pump body. The rear cam block is the one with no lip. It is symmetrical and goes in either way. The cam shaft goes in next, then the front cam block. It faces the way that I'm holding it here with the little lip towards the rear:
AP1GczPHnizg3uPS38iHl83tOeZPu39bPHyMsPBsXMy7W0SlA9POaqztMyf9DBLc6doi416dxyoiVo2G9K684XaXbzp-thbRVjUbO9OKpHHs252GyUCKd7jhV0wdTh0fPqGO1wpyyB2_ho_qv-LDmAfV8nBqvg=w1081-h1441-s-no-gm

Don't for get the little ring with an ear on it plate deal that hooks to the control valve oscillator housing like I almost did. Here's where it goes:
AP1GczP1eA0D7lrLFxwxKfyBRXhZ3Mvu8OhgB33ERWUvqndM5_s6u_KVhyk54yM-lfbTDINjyNrMct9aVXd2VOGZM6daut45GyWa__6tV5zuDx6iZDOJKFRCggdaEl0ST6JFAMrBsFuBMlGJu4P6wcGkQO8PGg=w1081-h1441-s-no-gm

AP1GczOKCpE0qREB7RK4_rSADyeWnrS_0QYwWMkq0erHgd2l8HwPmakE_CAoBIL8mZDk0USMDKq5reYM8HfPMs2YihD_mL1W4oqz58GNBQNdocYCL_LZgTjTachfGQPuQrHNcPp37z0WkP54a2ldNhQUSGTmtw=w1081-h1441-s-no-gm

And here it is back together except for one pin and the safety wire.
AP1GczO35zQoyz-b7YTGrhZG6b7AV2KOBVVWYTVjF7kR-KIWq6rUkDKWrDxSxFabVzbAvYS__sT5eyl4r6H5Zo_5mJ6xXk9owSVT9PZDKdVj_NcJ9G-XA5FBHQ9b_OIJFh68Xy7o1N-p_Z_b0AOOKqymBTmYQg=w1081-h1441-s-no-gm

AP1GczPH0ZiVs0IY11ihI0-cVZiam99kR9UBH4uawZURSk5YryOtha9GIyrDYqOXu9qcPUUVM780kqjSWwpIIKI0DyDcndauVB9JU4yqHbG1ZS4NrhaT0QoPfaNKBrB6ZIlt3pkprcon6TQJUc6498gbrO9n6g=w1081-h811-s-no-gm
 
I got pretty far into this and wound up making a post in another thread about how to troubleshoot the three point hitch lift pump and lift cylinder on a Massey 100 series. It's really similar on the series before and after. I'm going to stick the info on that I've compiled in here hoping that this thread will prove useful to someone in the future.

There is a troubleshooting section in the factory service manual. That's the place to start.
AP1GczNURGGWbActcJnNlcNCQZCxV267s3Xx6ONz6esDGSbnvs2ZN6KqEGB_nCStR9Rdx8z-lHn5VBtWH5JHzjtoXAwg4vKJsnaQahLLmWrLDvmQ_ZIK3-lKnVdb2c1ttC0bXLMLO_lIIjITeeC4Ue_DzD_kWw=w1080-h1408-s-no-gm

AP1GczOitSNM2nVaME71RTDdrh1f-yxrt8yupF2GCkYG-LUgQMM4qBlD62kJkyDRyKapwiO1VGYc17UzYQTAJnCZyKtXzqmHLN3eIyCbrII9Mqo-MkD4ToXNDBWGGMa3RHQoiJ5eR9bwGbov5sZZWT--fwqOtQ=w1080-h1400-s-no-gm

AP1GczPLqH5KtqsH2gEH25d1moApHFR-3K15GW350Jb7qrCid8M80ozUCM1rbajb_Lb-blPWRpidvsvFmprUcgkNR1h6TLqgp6z5G3Ep0lWX1xYZmxeUHMjuTy9mS_yXmDKIPUp6W7KerthJ0-j05UeBDAPjbA=w1080-h1381-s-no-gm


It could be as simple as an o-ring has blown out on the stand pipe, but my situation was worse. My lift cylinder was leaking badly, and the control valve on my hydraulic pump stuck and broke into pieces.

You're often going to wind up wanting to pull the bottom bolt from your response control cover on the right side of the differential casting, let the fluid drain to that level, pull the response cover, run the tractor like that and see if you can see any problem. Most everything you might need to do is going to require removing the top cover. You can usually get you can get the pump out through the top without splitting the tractor on ones that don't have an auxillary pump on top of the lift pump. I had to split my 175 because I have the auxillary pump.

This video does a great job explaining the lift hydraulic system. It's a pretty similar set up on a lot of Masseys:

This video shows the control valve going through its full normal range of motion. His has the pressure control box all the way on the left there. I didn't have that in place. I had some questions about both of these things initially:

Once I got into the pump and was trying to understand what everything was and how it came apart and went back together, I found this exploded view and parts list from the parts book handy:
AP1GczOdoy0pHPW1_nnx-Ul2xFM_DvZI6fCjIM2_45xvlbkzbBeCusNjFHr4MivPp_djz1dDPowfmZlyGRhFQ979_7Ln_hIy0zcZ3GUVMvTozMgtJiHqkEJJuXEhOf2gWtXPYJY3u_QwU10qw4rc-AtJfr9Qxg=w1056-h1350-s-no-gm

AP1GczOlAOovMC5YXJIMmSJRFVyr8t4uuNOv3eAgdTTm8LbqTIG-3Hm76Vu-VcR7nR364HjGxAwqlkPgdSq_lcL8WYV7E7DLkIoTs8Lssibwy3kl6-_GgJVsU6oyhvZe-ohCK0IkcbejYXQMxgQBPupn3OA2rg=w1044-h1359-s-no-gm
 
Last edited:

We sell tractor parts! We have the parts you need to repair your tractor - the right parts. Our low prices and years of research make us your best choice when you need parts. Shop Online Today.

Back
Top