"[b:654c4848f0][i:654c4848f0]how i can set the ignition in the correct position?[/i:654c4848f0][/b:654c4848f0]"
I am presuming that you want to set the ignition timing on your tractor.
Reviewed the [b:654c4848f0]OPERATOR'S MANUAL OM-T2-455 JOHN DEERE TRACTOR MODEL 40[/b:654c4848f0] in the [b:654c4848f0]PREVENTIVE MAINTENANCE[/b:654c4848f0] section under the [b:654c4848f0]IGNITION TIMING[/b:654c4848f0] heading on pages 78-79.
[b:654c4848f0][i:654c4848f0]<font color="#ff0000">Disclaimer: Please note that the following photos are of "Sparky" our 1951 Model M.
Setting the ignition timing for the Model 40 is <B><I>exactly[/i:654c4848f0][/b:654c4848f0] the same for the Model M.</I></B></font>
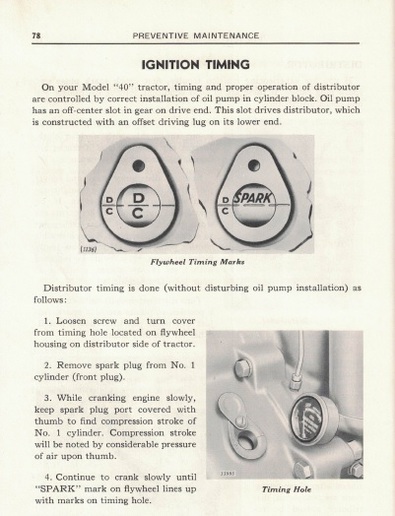
IGNITION TIMING
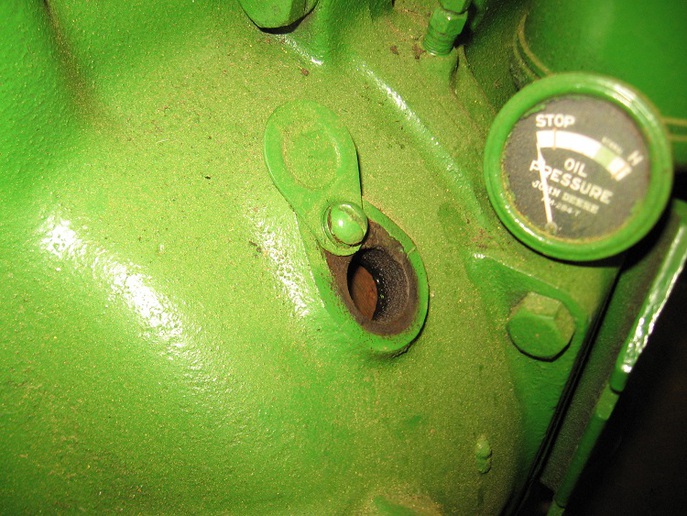
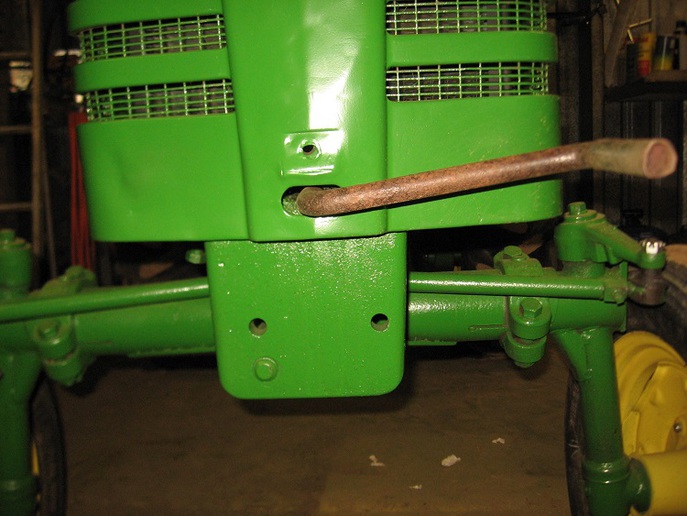
1. Loosen screw and turn cover from timing hole located on flywheel housing on distributor side of tractor.
2. Remove spark plug from No. 1 cylinder (front plug).
3. While cranking engine slowly, keep spark plug port covered with thumb to find proper engine revolution for compression stroke of No. 1 cylinder. Compression stroke will be noted by considerable pressure of air upon thumb.
[b:654c4848f0][i:654c4848f0]You might also consider using a hand crank.[/i:654c4848f0][/b:654c4848f0]
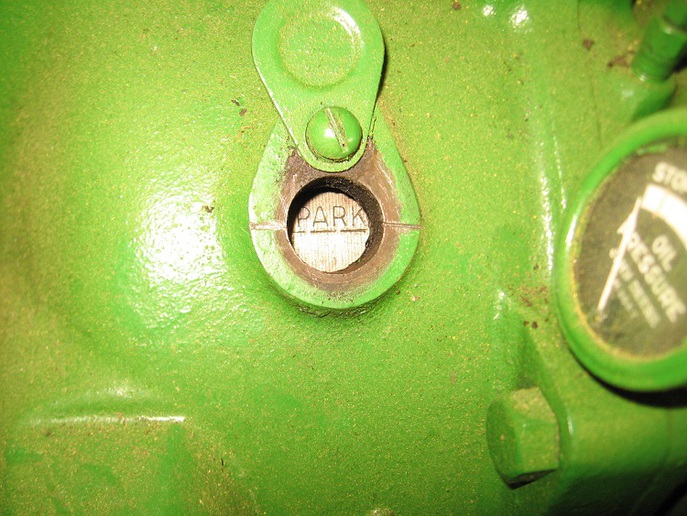
4. Continue to crank slowly until ?SPARK? mark on flywheel lines up with marks on timing hole.
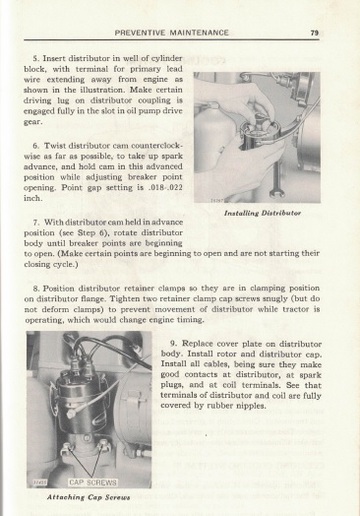
5. Insert distributor in well of cylinder block, with terminal for primary lead wire extending away from engine as shown in illustration. Make certain driving lug on distributor coupling is engaged its full distance in slot in oil pump drive gear.
[b:654c4848f0][i:654c4848f0]Loosen two retainer clamp cap screws.[/i:654c4848f0][/b:654c4848f0]
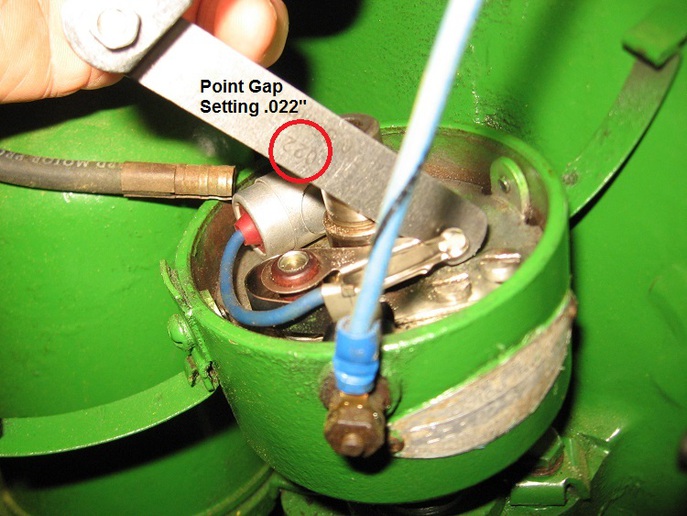
6. Twist distributor cam counterclockwise as far as possible, to take up spark advance, and hold cam in this advanced position while adjusting breaker point opening.
Point gap setting .018-.022.
7. With distributor cam held in advanced position (see Step 6), rotate distributor body until breaker points are beginning to open. (Make certain points are beginning to open and are not starting their closing cycle.)
8. Position distributor retainer clamps so they are in clamping position on distributor flange. Tighten two retainer clamp cap screws snugly (but do not deform clamps) to prevent movement of distributor while tractor is operating, which would change engine timing.
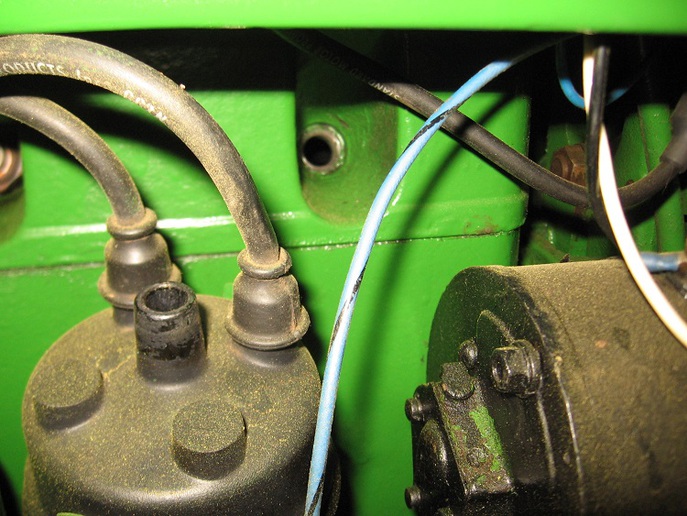
9. Replace cover plate on distributor body. Install rotor and distributor cap. Install all cables, being sure they make good contacts at distributor, at spark plug, and at coil terminals. See that terminals of distributor and coil are fully covered by rubber nipples.
Hope this helps.