Hi all,
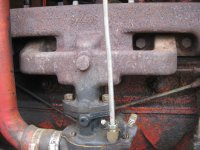
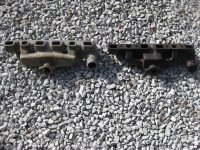
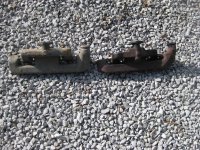
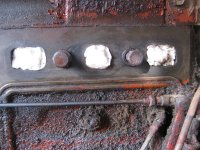
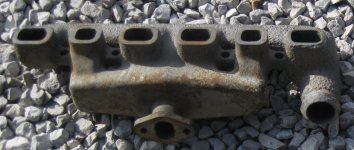
My '52 8N is starting to leak at the engine manifold near the #4 cylinder. Have not pulled this yet, hopefully it's just a gasket blowout, but we'll see. I have read most of the prior posts about reworking these surfaces if pitted.
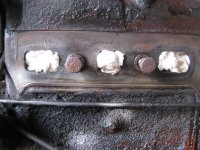
The wrinkle here is that the prior owner bolted this manifold up to the engine - no studs, no brass nuts or washers, just bolts. Hoping that he did not retap the holes to a larger size - again, we will have to see.
My question is - any suggestions on how to ease these bolts out without snapping them off? For rusty hardware I normally use a penetrant with some pounding, let it set awhile, then carefully and gradually work the bolt back and forth with a socket until it starts to turn. Not wild about using a torch for heat with the engine still in the tractor.
thanks,
Doug
My '52 8N is starting to leak at the engine manifold near the #4 cylinder. Have not pulled this yet, hopefully it's just a gasket blowout, but we'll see. I have read most of the prior posts about reworking these surfaces if pitted.
The wrinkle here is that the prior owner bolted this manifold up to the engine - no studs, no brass nuts or washers, just bolts. Hoping that he did not retap the holes to a larger size - again, we will have to see.
My question is - any suggestions on how to ease these bolts out without snapping them off? For rusty hardware I normally use a penetrant with some pounding, let it set awhile, then carefully and gradually work the bolt back and forth with a socket until it starts to turn. Not wild about using a torch for heat with the engine still in the tractor.
thanks,
Doug