MF265 Auxiliary Pump Replacement Part

Axtell

Member
Location
RDU, NC
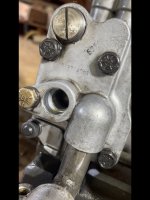
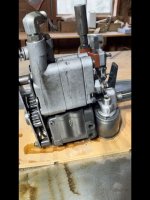
I will be replacing the Auxiliary Pump 1663627M92 on an MF265 and see where all the replacements come with a Restrictor or Pressure Relief Valve. I hope I am using the correct term. Mine does not, but I am guessing this will work. Are there any adjustments that need to be taken into consideration with this replacement?
 

Attachments

  • Aux_Pump_4502.jpg
    Aux_Pump_4502.jpg
    248.7 KB · Views: 12
  • Aux_Pump_4501.jpg
    Aux_Pump_4501.jpg
    246.1 KB · Views: 13
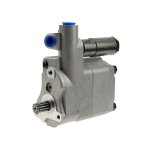
  • ref-1663627m92.jpg
    ref-1663627m92.jpg
    40.2 KB · Views: 11
Have another question regarding the new replacement Auxiliary Pump. I started moving some of the old parts/fittings over to the new pump and noticed I cannot turn the shaft on the new pump. It's locked tighter than a tick whereas the old one I can easily turn it and hear the sucking sounds from inside. Could the new pump be defective or is the old one so warn out it can be turned by hand? To clarify, the shaft I am speaking about is the one like in the above pic ref-1663627m92.jpg.
 
I was able to turn the shaft a little with a pair of pliers, but only enough for it to move. As far as the tightness of the shaft I was told this is normal. They also said it would not hurt to put a little oil in the pump and turn the shaft with a pair of vice grip pliers to pre-oil the pump. After installation you may hear some noise from the pump but should lessen over time.
 
Axtell, how did the install go? I recently replaced the auxiliary pump on a 263 and you are correct about it being hard to turn by hand. That is normal though and just shows how worn out the old pump is. The one I replaced you could spin it like a top with two fingers.

I believe the pressure relief valve on the new pump is either 2500 or 2700 psi. If the old one did not have a relief valve on it you likely have one somewhere else on the tractor. It won’t necessarily hurt to have two but you need at least one so before you take it out make sure you locate the existing one if it is there. You shouldn’t have to adjust the one on the pump.

On the 263 there is an exterior relief valve for the low pressure output on that pump that puts pressure to your pto clutch. I would imagine the 265 is similar.

AGCO parts books has a good breakdown of the hydraulic system and other part assemblies if you ever need a reference.

Hardest part of it all is getting the splines to align when you shove the tractor back together.

Best of luck!
 
Thanks for the reply James!

I did finish the install about 2 weeks ago. It was a good experience. This is my 4 split (8N, MF35 (three times!) and the 265, so I am getting a little more comfortable with it. I did splurge and get the Sparex splitting stands. It made a difference on the last 35 split and the 265. I can honestly say the 265 was the easiest. It rolled across the floor better than the 35.

That's good information on the tightness of those new pumps. It made it a little harder lining up the bottom spline, but more on that in a few. Getting into hydraulics like that for the first time was a little intimidating, but the more you read about it, watch YouTube videos, and have someone to talk to it helps a lot.

The stock photo above has a split bolt or nut just below one of the blue plugs. The new pump had this set farther in than the old one. I asked the mechanic I get advice from when I can was not sure about that, but on all the ones he installed over the years there were no further adjustments he had to make. That worked for me.

I don't think I have that exterior relief valve maybe because this 265 does not have the PTO clutch (Live). Without HI-LO and the PTO clutch, I also thought it would not have the line that runs from the transmission into the center housing either, but it did.

I am all over AGCO looking at parts breakdowns and getting part numbers for MF and Hesston! It's a good source.

Talking about the dreaded splines... After about 3 attempts I had to regroup and do something different. I ended up just first joining the tractor without the upper shaft just for the sake of getting the lower splines meshed. I brought the two halves close together, visually lined up the splines the best I could and put a decent amount of grease on both ends. Next, I braced myself on the back of the tractor and pulled the front half towards me with one arm until the two halves of the housing met. I was confident that was a good fit. The ease of the roll with those stands really helped. After that I separated them again and worked on the upper shaft and wiggled it into place.

I have a couple of other threads for the general separating and inspection process at:

Thanks again!
 

We sell tractor parts! We have the parts you need to repair your tractor - the right parts. Our low prices and years of research make us your best choice when you need parts. Shop Online Today.

Back
Top