


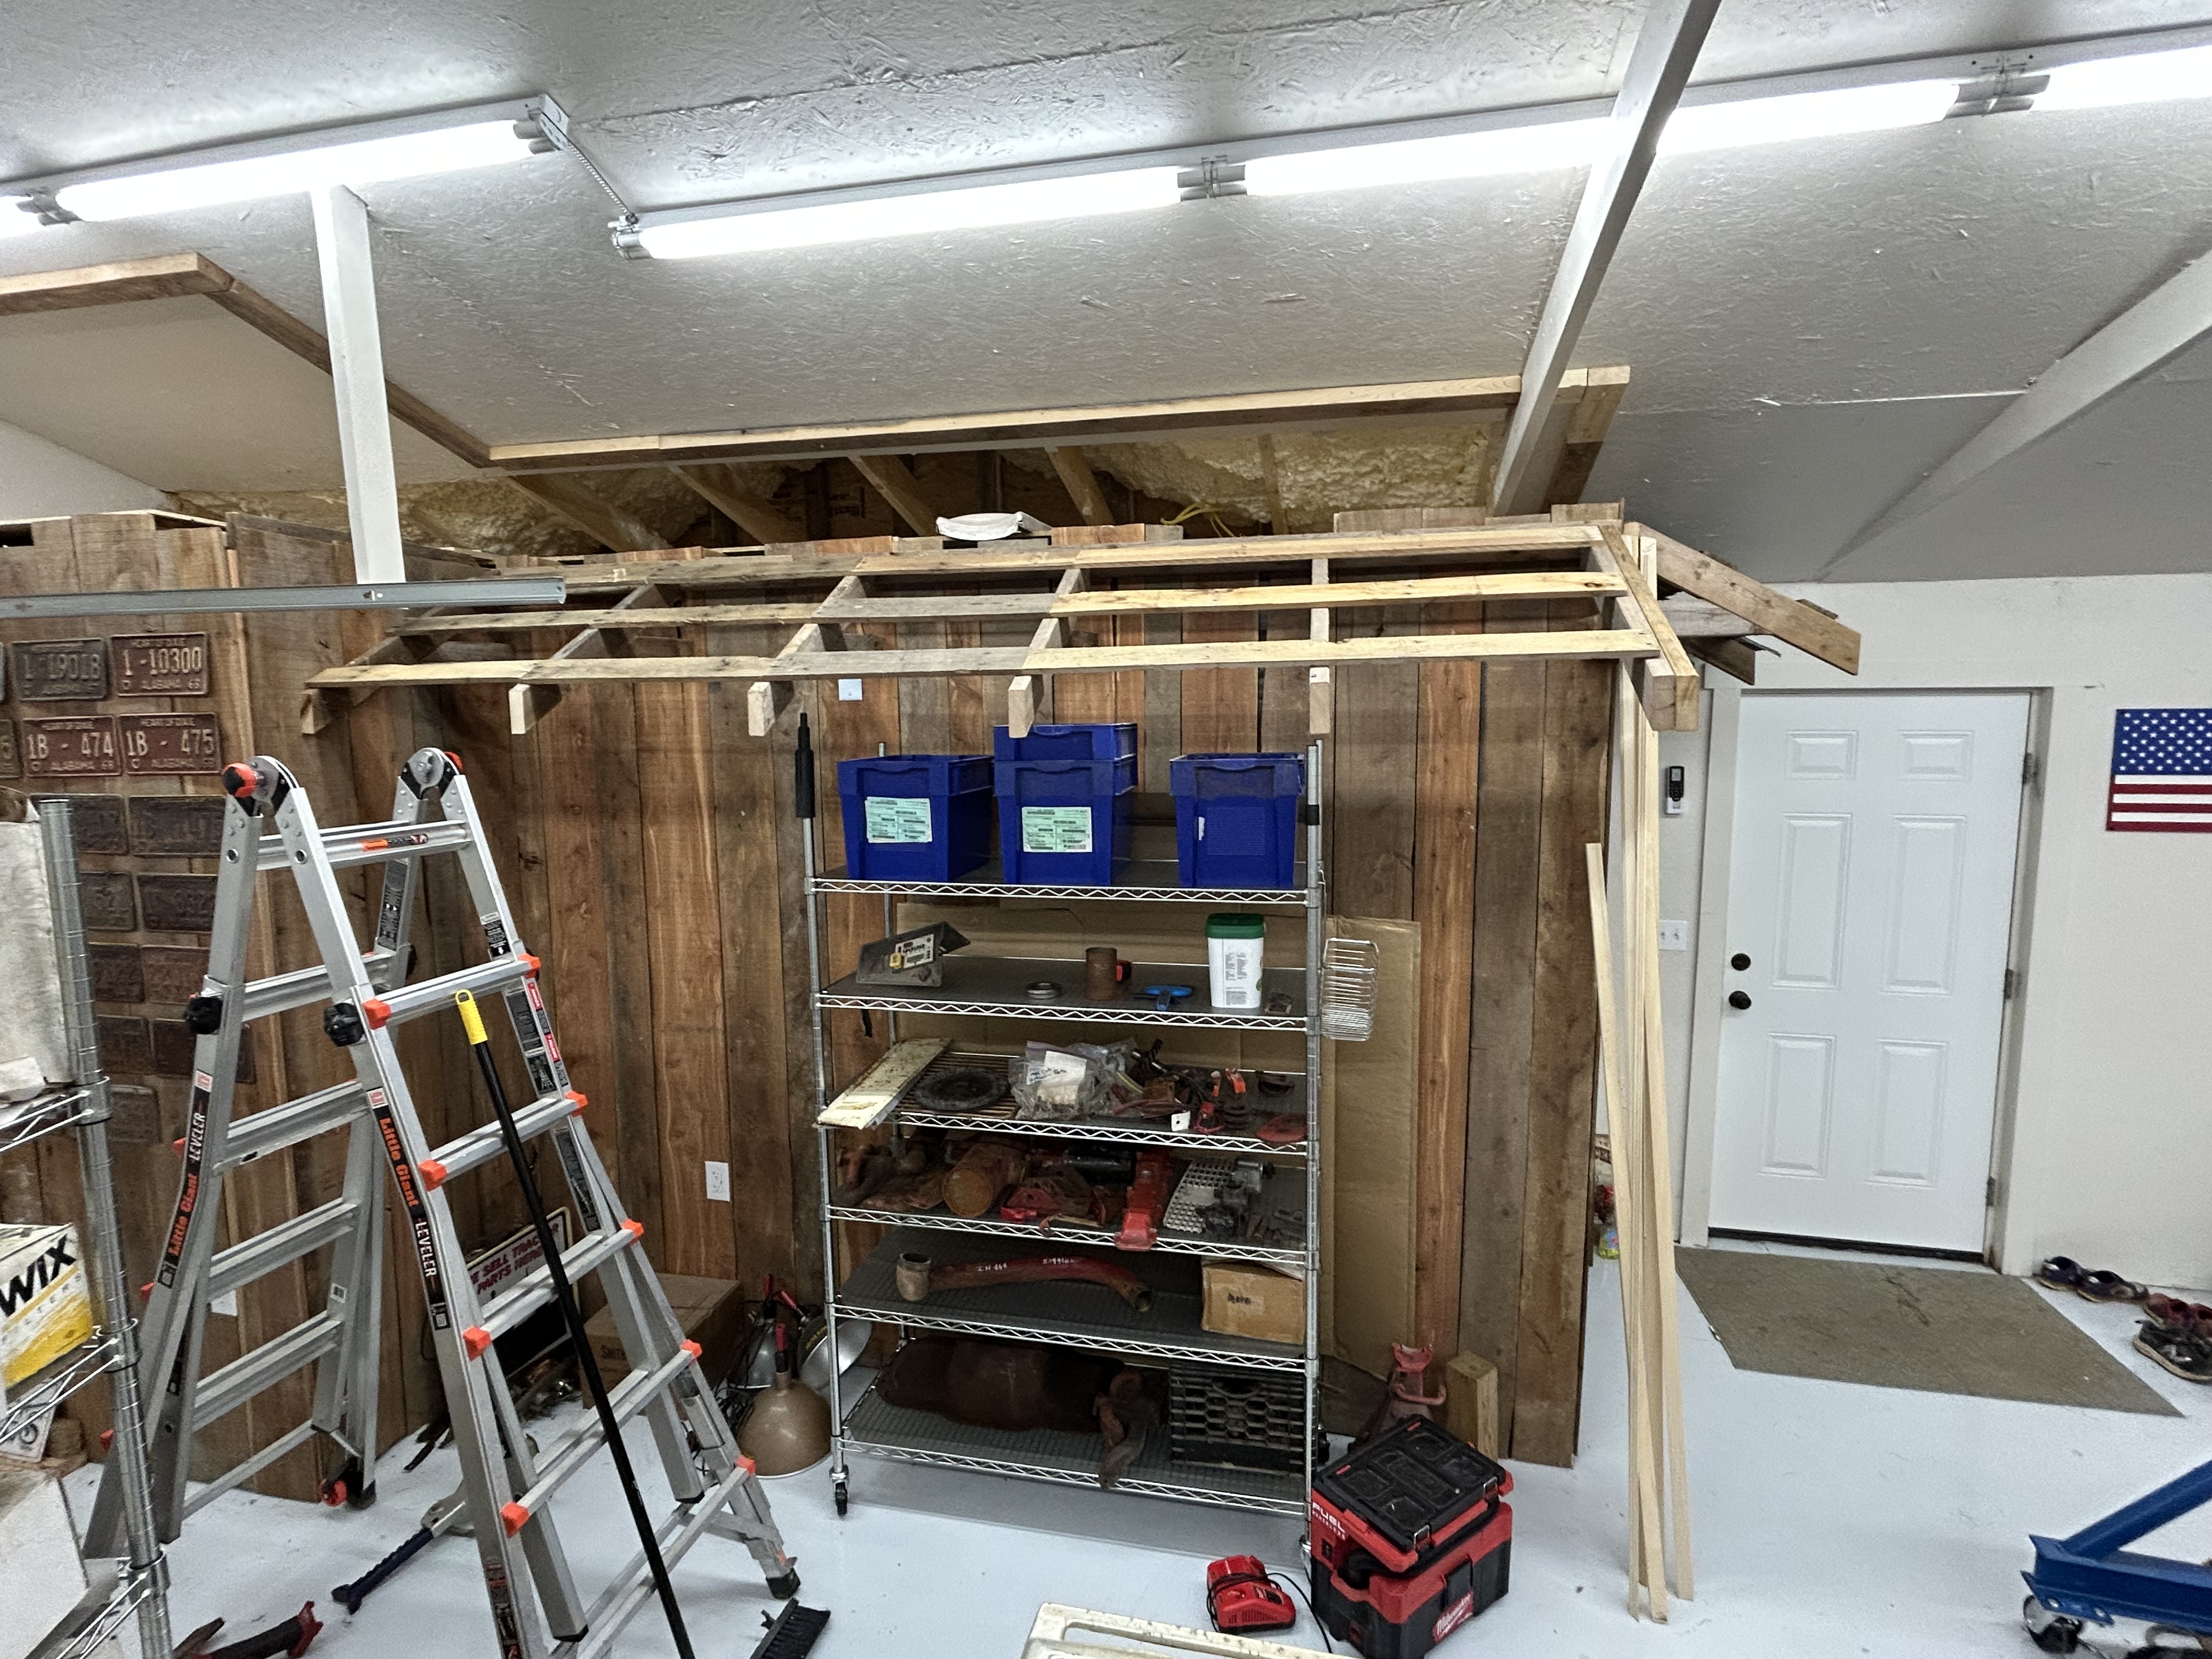
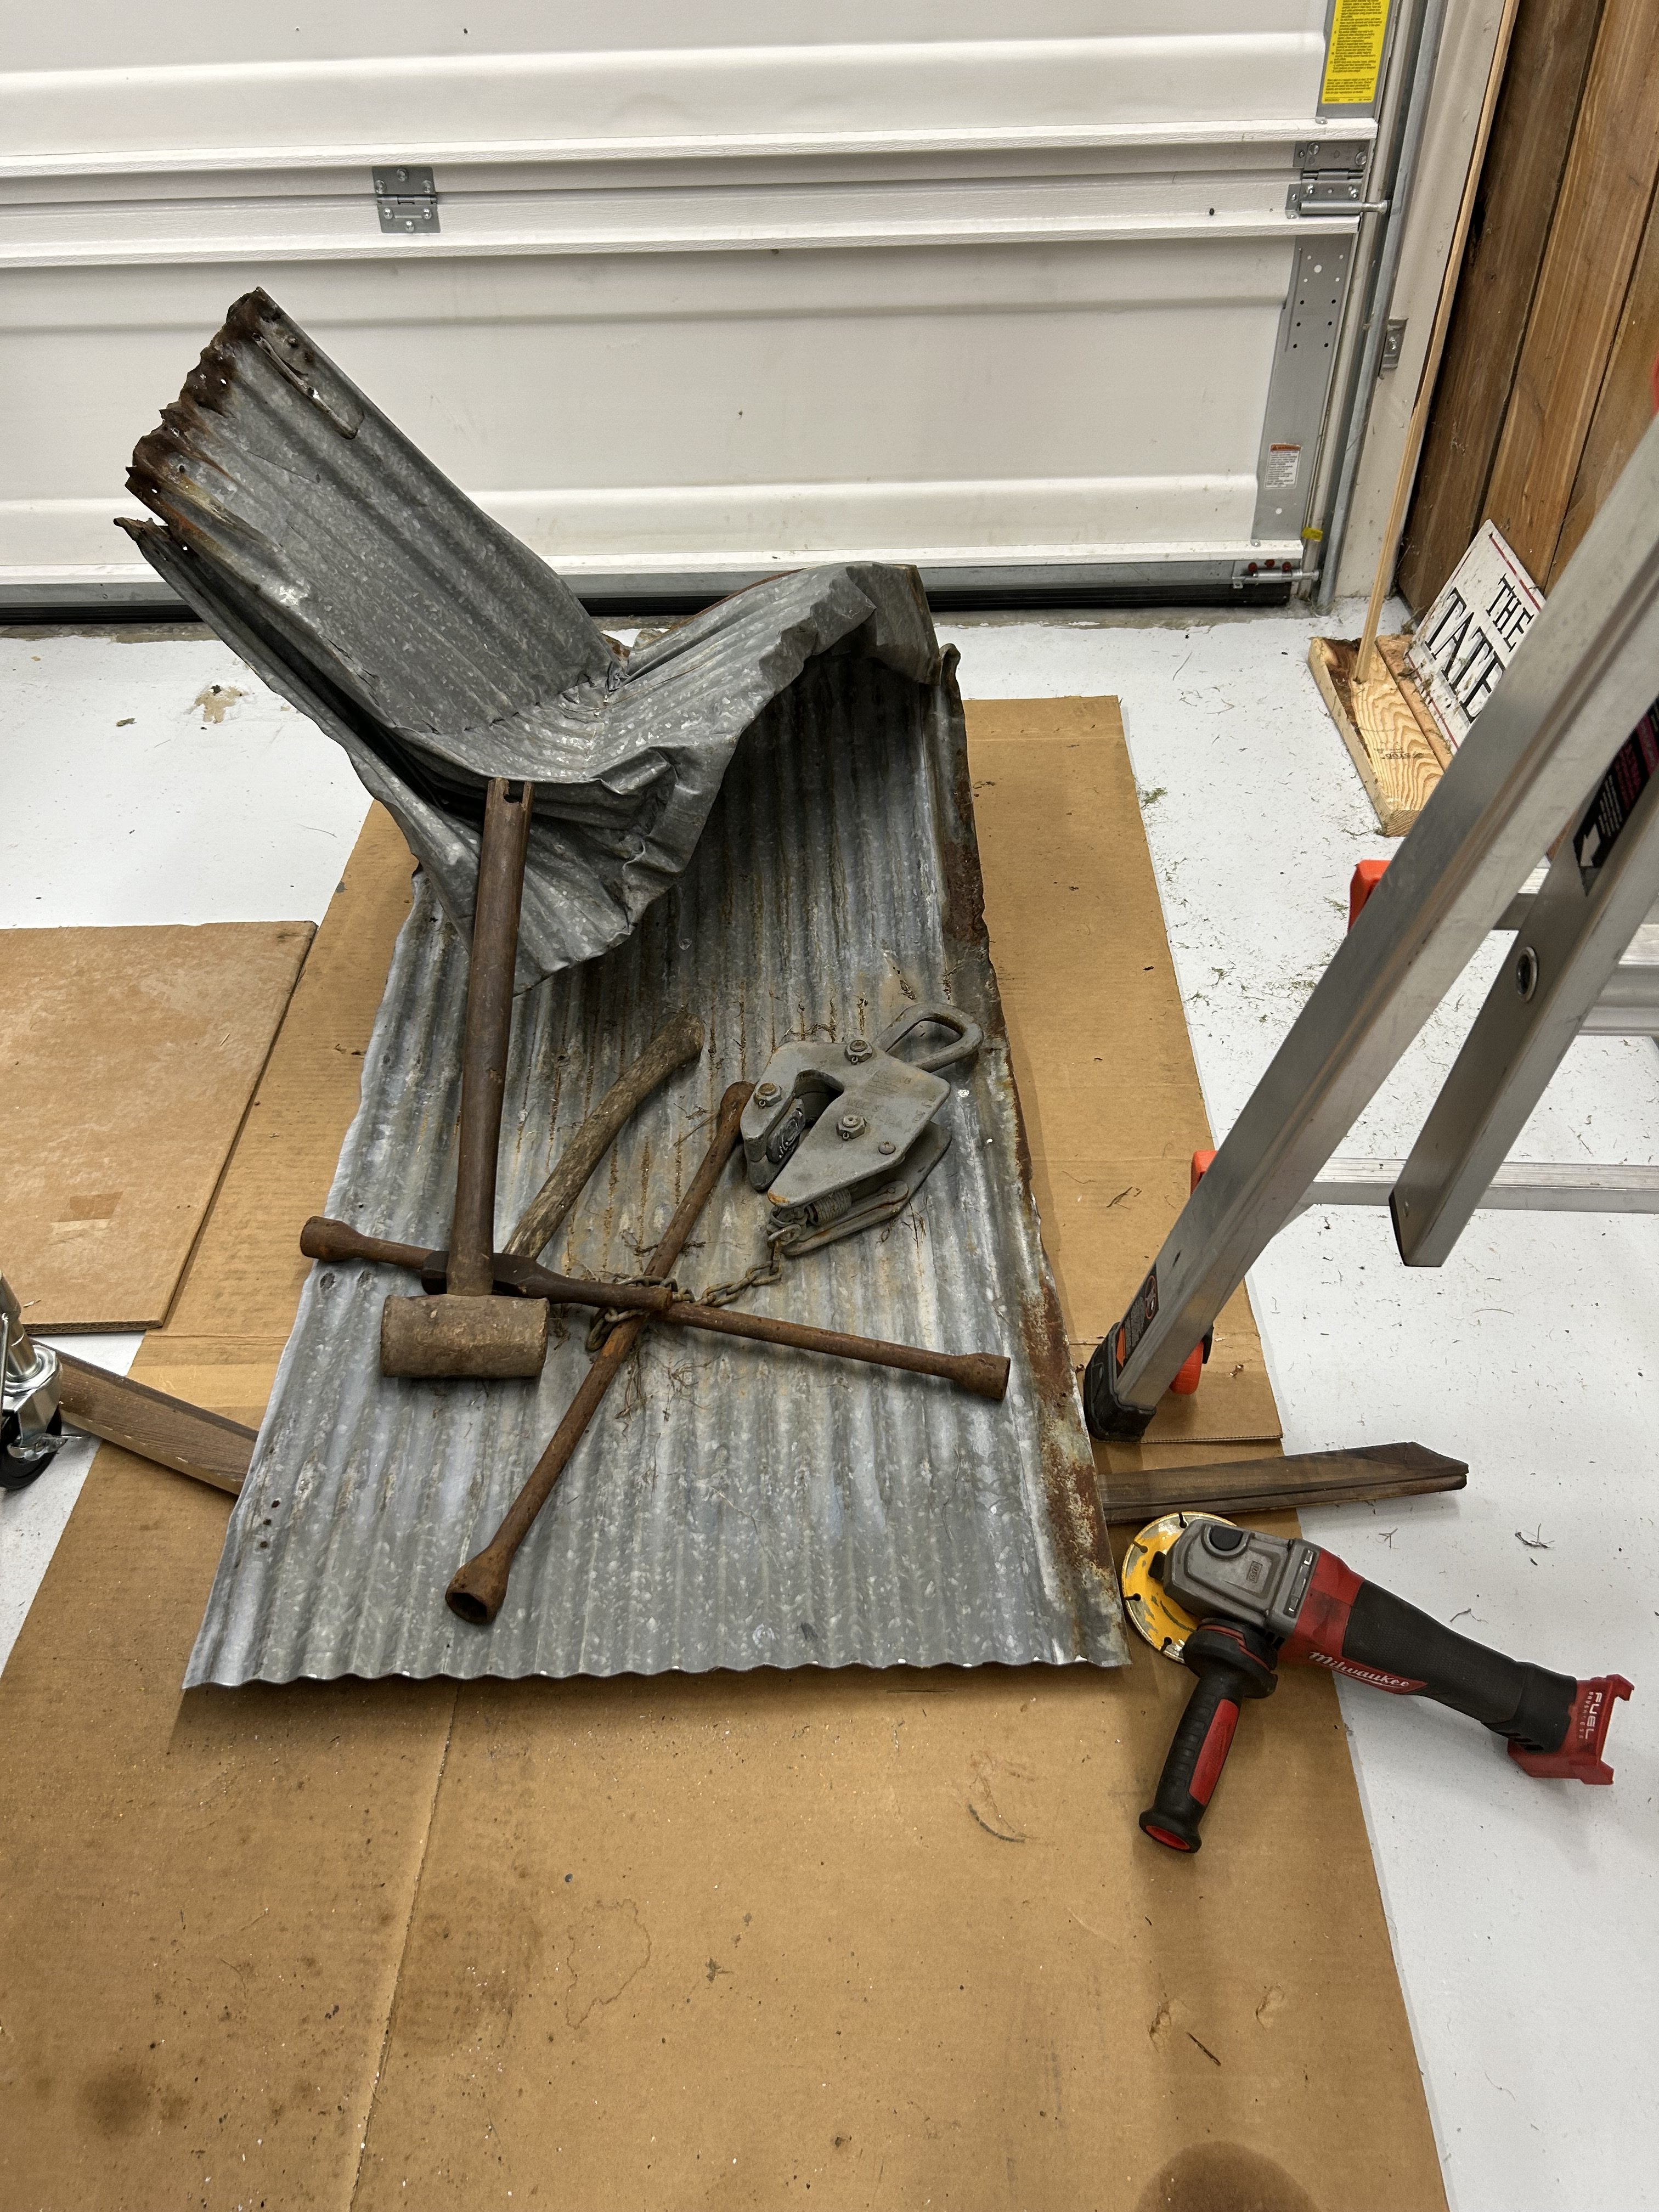
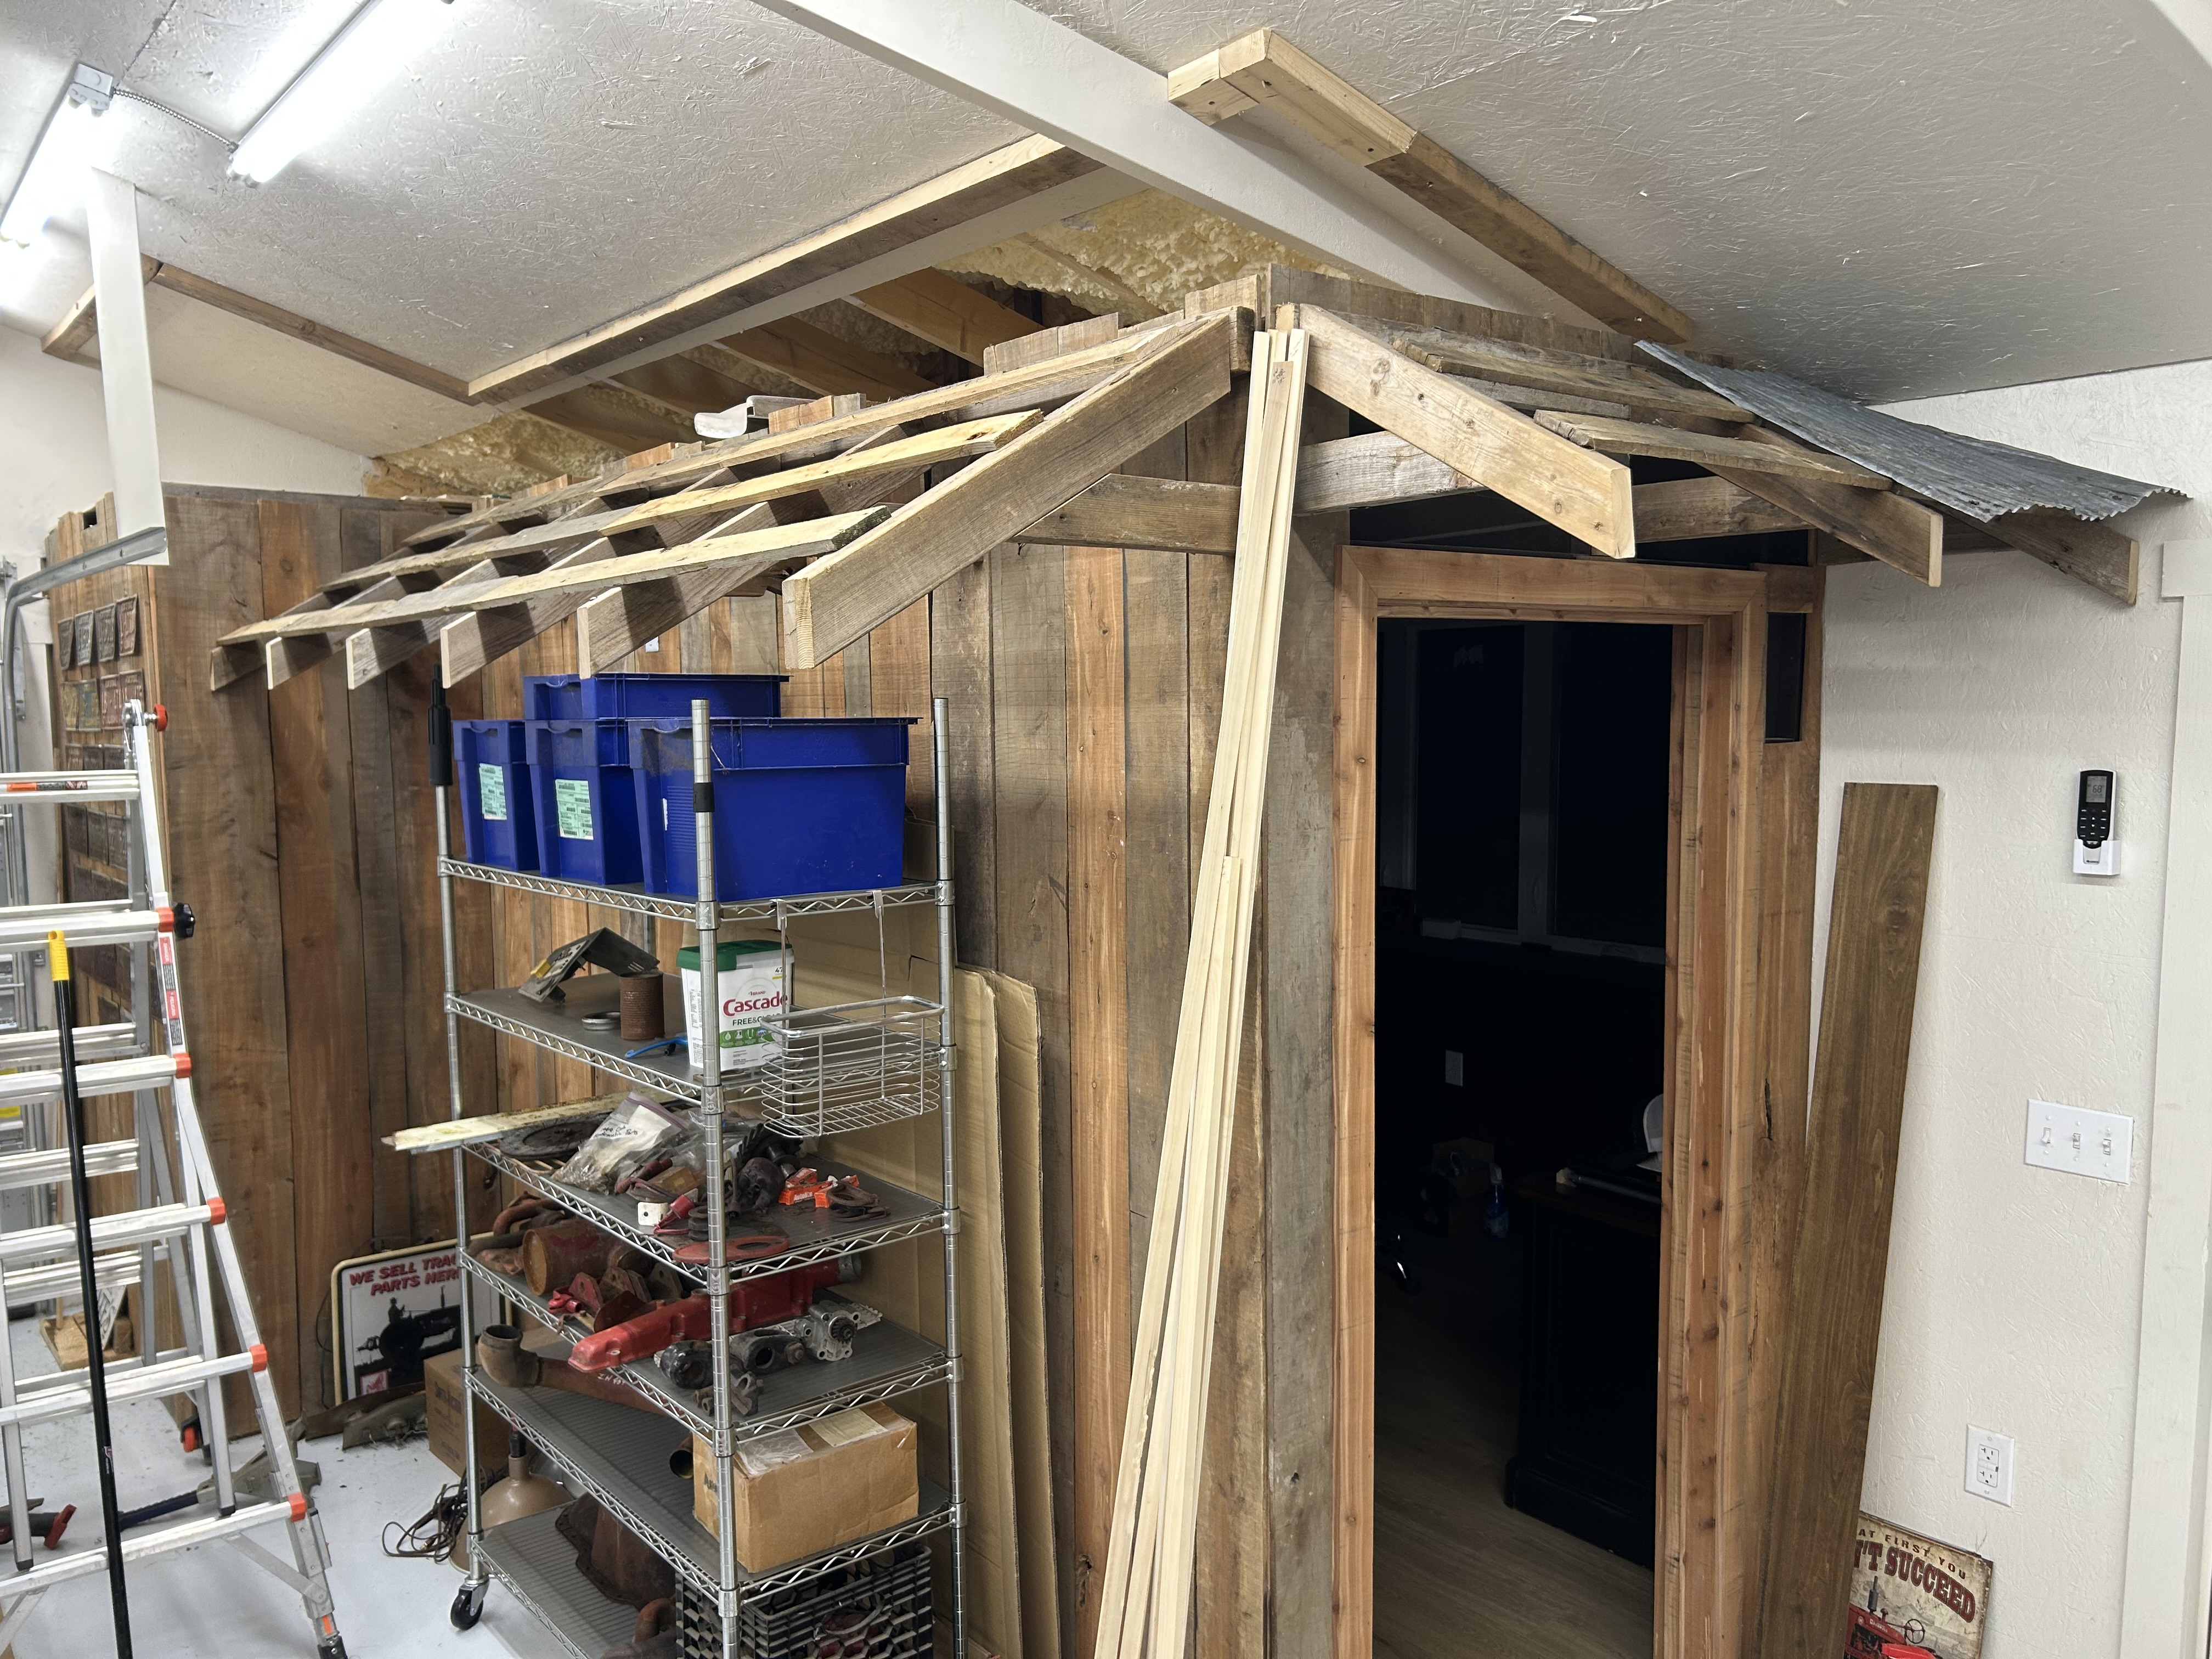
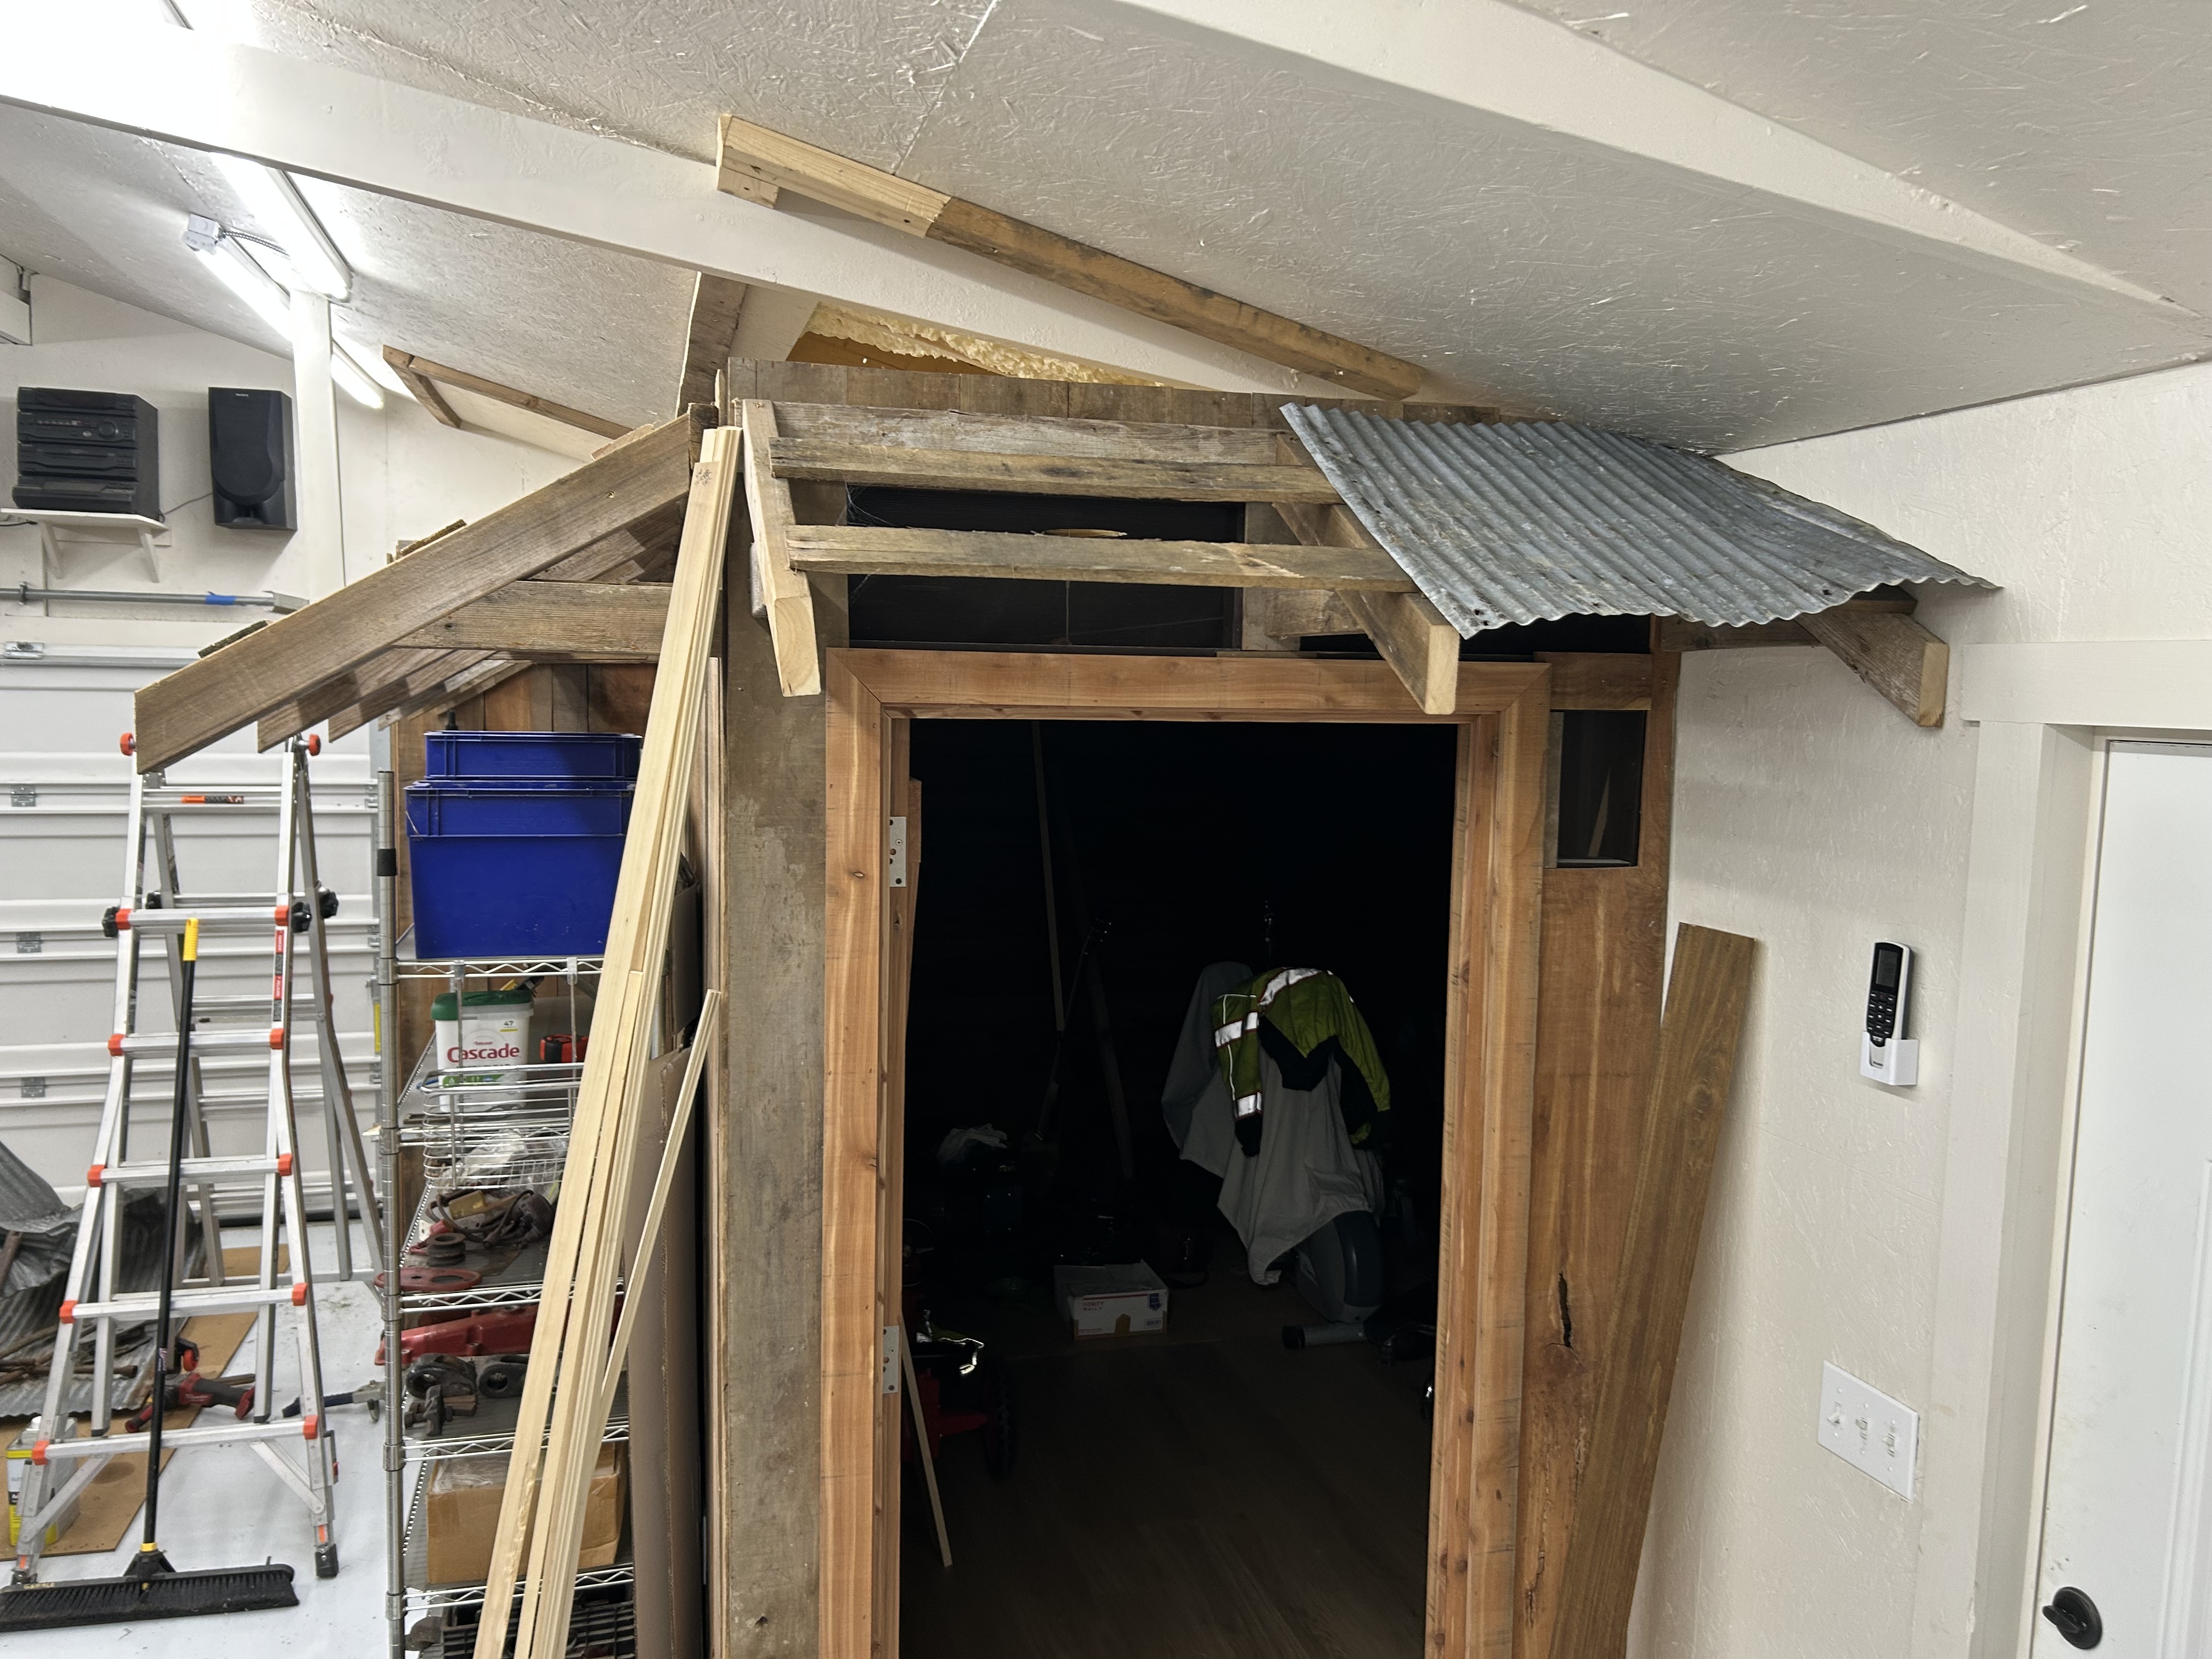
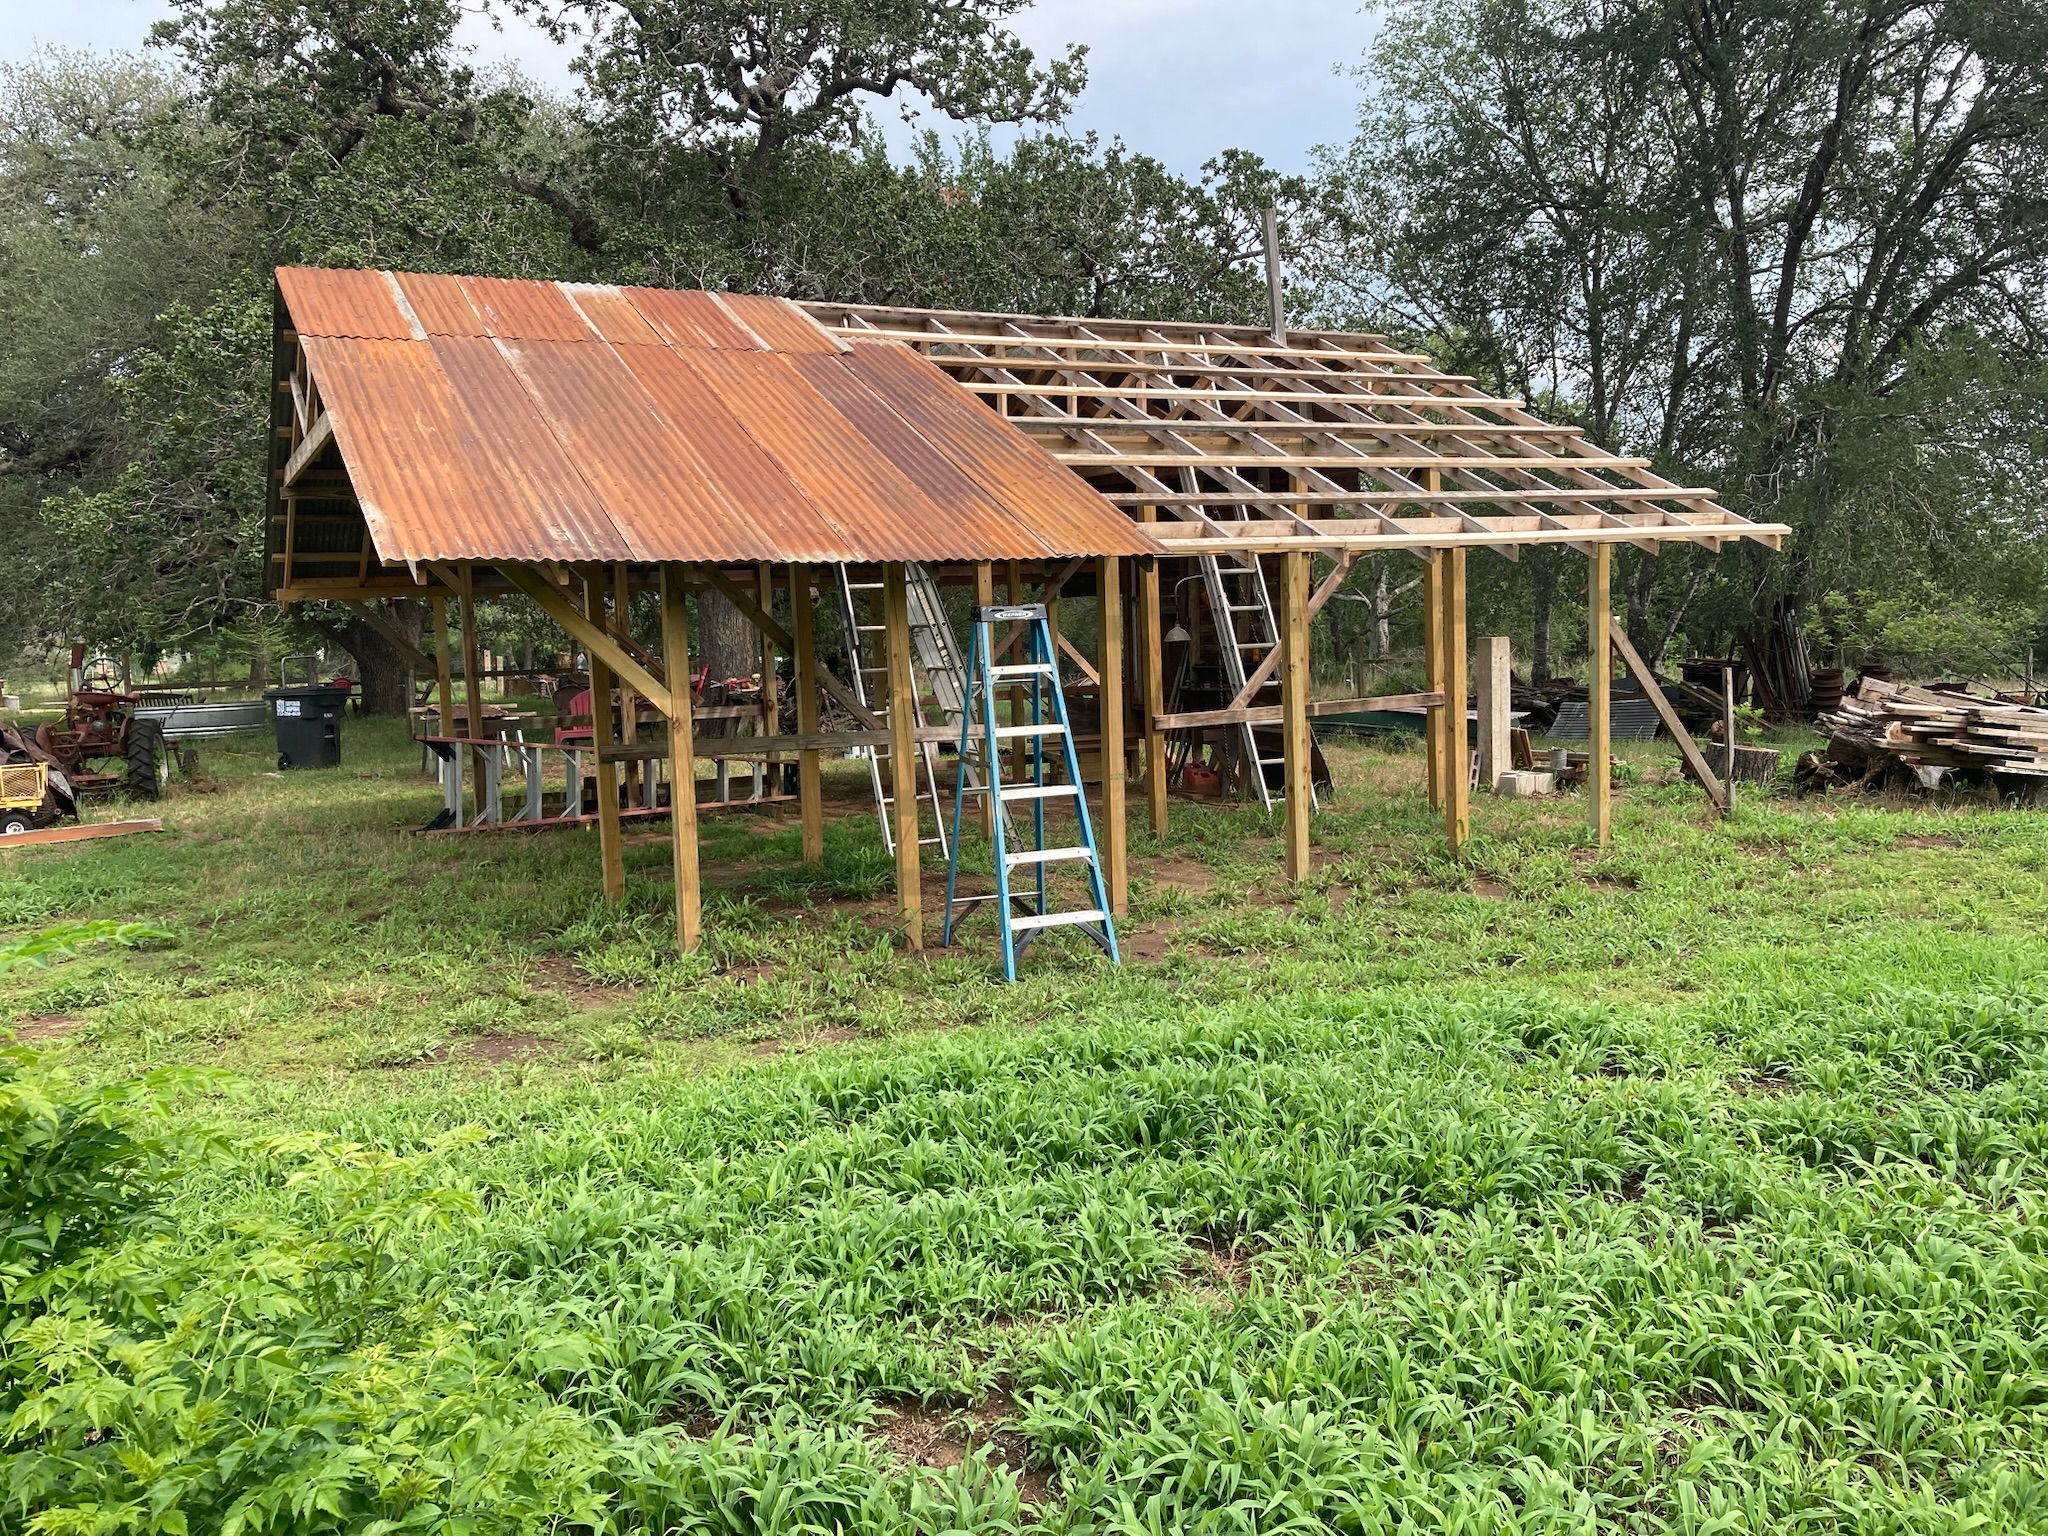
How would a guy go about putting up used sheets of 10 on this fake overhang that I’m building in my shop. I’m making it so it looks like the outside of an old store. I’m using old, used tin and cutting it with the grinder in the picture. I’m not a framer, so I know that my woodworking is probably not exactly straight, so I need help on going about how to cut the tin and screw it down so it looks good and straight all the way across. I will also say that because of my man door going outside, The overhang is a little shorter when it turns the corner. in that case, I’m going to have to come up with a way to make the corner transition as smooth as possible. I’ve never done anything like this, so send all the help you can.
You are using an out of date browser. It may not display this or other websites correctly.
You should upgrade or use an alternative browser.
You should upgrade or use an alternative browser.
used red MN
Well-known Member
- Location
- Coon Rapids, MN
You’re probably going to have to move your purlins/furring strips down closer to the edge of the tin. Hard to make ice cream out of horse poo!
Edit to add: and you got to much time on your hands. Don’t you have a couple of young kids and an ancient Studebaker? And a Ford N tractor! Better invest in a wax factory, cause you got both ends a blazing!
Edit 2: and in a post I think you said you wanted to restore 2 or 3 tractors a year??
Edit to add: and you got to much time on your hands. Don’t you have a couple of young kids and an ancient Studebaker? And a Ford N tractor! Better invest in a wax factory, cause you got both ends a blazing!
Edit 2: and in a post I think you said you wanted to restore 2 or 3 tractors a year??
Last edited:
BillinCentralMO
Well-known Member
I like the way it looks already. Except clumsy me would gash my big head on it. Good luck.How would a guy go about putting up used sheets of 10 on this fake overhang that I’m building in my shop. I’m making it so it looks like the outside of an old store. I’m using old, used tin and cutting it with the grinder in the picture. I’m not a framer, so I know that my woodworking is probably not exactly straight, so I need help on going about how to cut the tin and screw it down so it looks good and straight all the way across. I will also say that because of my man door going outside, The overhang is a little shorter when it turns the corner. in that case, I’m going to have to come up with a way to make the corner transition as smooth as possible. I’ve never done anything like this, so send all the help you can.
View attachment 161724
View attachment 161725
View attachment 161726
View attachment 161727

Loosehandle
Well-known Member
- Location
- Wisconsin
Fascia board
Richard G.
Well-known Member
There are programs online that show how to make that corner.How would a guy go about putting up used sheets of 10 on this fake overhang that I’m building in my shop. I’m making it so it looks like the outside of an old store. I’m using old, used tin and cutting it with the grinder in the picture. I’m not a framer, so I know that my woodworking is probably not exactly straight, so I need help on going about how to cut the tin and screw it down so it looks good and straight all the way across. I will also say that because of my man door going outside, The overhang is a little shorter when it turns the corner. in that case, I’m going to have to come up with a way to make the corner transition as smooth as possible. I’ve never done anything like this, so send all the help you can.
View attachment 161724
View attachment 161725
View attachment 161726
View attachment 161727
My son uses them.
I bought a nibbler years ago to cut tin.
It goes on my Ryobi drill driver.

MM-TX
Member
- Location
- Ottine Texas
Your purlins are too far from the edge to pull crooked tin to look straight. Crooked tin doesn’t look straight. To use that tin and expect it to look straight you have make some kind of dolly to pound out creases in the individual corrugations. That won’t fix waves, it makes waves that you can pull out if your purlins are close enough to the edge. It's also a real PITA. You seem critical enough of looks I would suggest buying some used tin that looks straight.
Your cutter is fine. I hope you wear good goggles.
To make your corner as I mentioned before your purlins need to go under the corner or how do you expect to fasten / hold up the tin? Cantilever with longer purlins would have been the easiest. And still would be since your tin isn't on yet.
If you don't want to redo them and decide add to them you can, since it is not real structure, if you figure a way to hold them in place. Old guys would make all manner of splices with a tin a plate over the joint. I don't mean like a plate from big box, shinny and full of holes. If they had a shed with the corner of something get wobbly from rot and didn't want to tear into it right then they would go cut a square of tin the right size, bob the corners, and nail it over the joint with little nails. On my 130+ year old sheds still in use I see some of the old patches and grin. I have a couple on the farmhouse kitchen floor where they covered a hole. They just add patina and blend right in.
You can also cut a hip rafter and it will all hold itself up after you wrestle all those unruly pieces into place. Hard at this point but possible.
Tin fastens with screws through the top so you have some tight places with your ceiling so flat tin lets you skip fasteners. Otherwise drill holes first so you can use a ratchet instead of a drill. Good luck.
Your cutter is fine. I hope you wear good goggles.
To make your corner as I mentioned before your purlins need to go under the corner or how do you expect to fasten / hold up the tin? Cantilever with longer purlins would have been the easiest. And still would be since your tin isn't on yet.
If you don't want to redo them and decide add to them you can, since it is not real structure, if you figure a way to hold them in place. Old guys would make all manner of splices with a tin a plate over the joint. I don't mean like a plate from big box, shinny and full of holes. If they had a shed with the corner of something get wobbly from rot and didn't want to tear into it right then they would go cut a square of tin the right size, bob the corners, and nail it over the joint with little nails. On my 130+ year old sheds still in use I see some of the old patches and grin. I have a couple on the farmhouse kitchen floor where they covered a hole. They just add patina and blend right in.
You can also cut a hip rafter and it will all hold itself up after you wrestle all those unruly pieces into place. Hard at this point but possible.
Tin fastens with screws through the top so you have some tight places with your ceiling so flat tin lets you skip fasteners. Otherwise drill holes first so you can use a ratchet instead of a drill. Good luck.
Last edited:

Mule Meat
Well-known Member
You will never get tin to lay even partially right on that if I am looking at the pictures correctly.
First you need another purlin at the bottom of the rafters and a fascia board. Then another rafter at a 45° to tie where the two corners meet together.
Again looking at photo 3 and 4 that can't be done correctly due to the different heights of the rafters. Tin will never transition right or look good when placed at two different heights on the corner of a building.
First you need another purlin at the bottom of the rafters and a fascia board. Then another rafter at a 45° to tie where the two corners meet together.
Again looking at photo 3 and 4 that can't be done correctly due to the different heights of the rafters. Tin will never transition right or look good when placed at two different heights on the corner of a building.
used red MN
Well-known Member
- Location
- Coon Rapids, MN
I assume you are just going to have a triangular shaped section at the corner I think it might be called a hip. Its edge or length will have to meet up with the overhead door side at the same length and you’ll just have to live with the offset. Maybe you can place some type of ornamental do-hicky in the offset to give the impression that you intended the space for a purpose.Again looking at photo 3 and 4 that can't be done correctly due to the different heights of the rafters. Tin will never transition right or look good when placed at two different heights on the corner of a building.
Edit: find some ridge cap sections to cover the seams on the sides of the triangle section. Here is a link to new at HD but you want to find some rusty weathered stuff. L
HD Tin ridge cap
Last edited:
MM-TX
Member
- Location
- Ottine Texas
If your tin is straight at the outer end you can have that edge be pretty far from your last purlin. Both my pictures are about 4" past the last purlin but could have been a lot more. My used tin was pretty straight and I fixed what wasn't before it went up. Your style doesn't want a fascia.
Where you join those roofs at the corner is going to be fiddly at best. You just have to continue each straight until they meet. And they will meet oddly but then you can figure out how to minimize the wonk. With no structure under it it is going to kick your ..... When done your stye will look fine if you do it neat and don't let it stay unfinished. I've seen a lot of really odd trim look fine when finished.
 `
`
Where you join those roofs at the corner is going to be fiddly at best. You just have to continue each straight until they meet. And they will meet oddly but then you can figure out how to minimize the wonk. With no structure under it it is going to kick your ..... When done your stye will look fine if you do it neat and don't let it stay unfinished. I've seen a lot of really odd trim look fine when finished.
Last edited:
used red MN
Well-known Member
- Location
- Coon Rapids, MN
What?I made a 3-4-5 square out of 1x4 lumber

wh
Well-known Member
We always used 6 8 10 Always worked perfect. And if you wanted to, just stretch a string line off the end of rafters where you want the edge of tin to be.I made a 3-4-5 square out of 1x4 lumber when roofing my tractor shed. It worked good on the straight walls.
flying belgian
Well-known Member
And ear plugs.I put up a tin shed years ago and cut the tin with a Circular saw with the blade mounted backwards! I was surprised how good it worked! P.S. WEAR SAFTEY GOGGLES!!!

Fixingfarmer
Well-known Member
I wouldn’t worry too much how far the tin is from the edge it’s inside a shed you can get away with just about anything and you are going for looks the straight piece of tin you have will be straight enough get more of that if you only have one piece
Just keep it high enough you don’t hit your head on it
I like used red mns idea of three purlins across the corner and then two pieces of ridge cap that would be simple and quick you would be cutting one triangle
Edit: you might have to make a creative notch where the new boards go on the corner and stagger them with what’s already there 3 seems like plenty but maybe add a 4th at the top of the corner and stagger them down till the last one is on the end
Dark Grey screws or brown to match rust if it’s rusty enough
Just keep it high enough you don’t hit your head on it
I like used red mns idea of three purlins across the corner and then two pieces of ridge cap that would be simple and quick you would be cutting one triangle
Edit: you might have to make a creative notch where the new boards go on the corner and stagger them with what’s already there 3 seems like plenty but maybe add a 4th at the top of the corner and stagger them down till the last one is on the end
Dark Grey screws or brown to match rust if it’s rusty enough
You mean the board that the tin sits directly on? Why? So it will screw down flat as possible? I can do that but I'm more concerned about cutting it so It is straight as I place them across.You’re probably going to have to move your purlins/furring strips down closer to the edge of the tin. Hard to make ice cream out of horse poo!
Edit to add: and you got to much time on your hands. Don’t you have a couple of young kids and an ancient Studebaker? And a Ford N tractor! Better invest in a wax factory, cause you got both ends a blazing!
Edit 2: and in a post I think you said you wanted to restore 2 or 3 tractors a year??
EDIT: I have 3 young kids (6 , 4 , 6 months), a wife, a dog, a 110 year old Studebaker, a 1974 IH 200 4x4 , a couple vintage mini bikes, several Cub Cadet lawn tractors, Pennsylvania Panzer, 1960s Craftsman Minature Riding Mower, Gibson Model D, Speedex 1650, a few Jubilee & 601 series Fords, a Few MF Tractors, an Oliver 60 Industrial, Oliver 70 RC, Allis CA, Allis G, Allis Chalmers D-10, Allis D-17 Series 3, Allis D-17 Series 4, Allis 210, John Deere 455G Track Loader, 1936 Graham Bradley/Paige Roto Tiller, (2) restored Maytag Engines, 1936 Farmall F-20, 1968 Farmall 140 High Crop, 1970 VW Beetle Partially Restored (in process), 1968 Astra 2+2 VW Kit Car (needs restoration), (38) Farmall Cub Tractors, (1) Farmall Cub Lo-Boy with Fast Hitch, (1) International Cub Lo-Boy with Front Blade & Auburn Trencher, (1) Cub 154 Lo-Boy, (1) Cub 184 Lo-Boy Parts Tractor, (5) Farmall A Tractors, (22) Farmall Super A tractors, (1) International Super A Industrial, (5) Farmall 100 Tractors, (3) Farmall 130 Tractors, (24) Farmall 140s, (2) Farmall C's, (1) Farmall Super C, (3) Farmall 200's, (1) Farmall 230, (1) International 240, (6) Farmall H's, (8) Farmall M's, (3) Farmall MD's, (1) McCormick Farmall W-9, (1) IH 364, (1) IH 464, (1) IH 404, (1) IH 584, implements to fit all of these tractors to include but not limited to about 40 complete sets of cultivators, 15 or so complete planter and side dresser units, plows, disks, rotary cutters, fast hitch equipment, snap couple equipment, several Covington Planters, plus all kinds of misc. stuff! That list SHOULD BE fairly complete as I keep a spreadsheet on everything as it comes/goes.
MM-TX
Member
- Location
- Ottine Texas
With all that under your belt I can’t imagine how you need anybody’s advice on anything 
I thought about getting a nibbler but the grinder with that nice blade did really good.There are programs online that show how to make that corner.
My son uses them.
I bought a nibbler years ago to cut tin.
It goes on my Ryobi drill driver.
haha, I don't know everything and want it all to be a perfect as possible. I get stumped on stuff and never get it done.With all that under your belt I can’t imagine how you need anybody’s advice on anything

We sell tractor parts! We have the parts you need to repair your tractor - the right parts. Our low prices and years of research make us your best choice when you need parts. Shop Online Today.
Copyright © 1997-2025 Yesterday's Tractor Co.
All Rights Reserved. Reproduction of any part of this website, including design and content, without written permission is strictly prohibited. Trade Marks and Trade Names contained and used in this Website are those of others, and are used in this Website in a descriptive sense to refer to the products of others. Use of this Web site constitutes acceptance of our User Agreement and Privacy Policy TRADEMARK DISCLAIMER: Tradenames and Trademarks referred to within Yesterday's Tractor Co. products and within the Yesterday's Tractor Co. websites are the property of their respective trademark holders. None of these trademark holders are affiliated with Yesterday's Tractor Co., our products, or our website nor are we sponsored by them. John Deere and its logos are the registered trademarks of the John Deere Corporation. Agco, Agco Allis, White, Massey Ferguson and their logos are the registered trademarks of AGCO Corporation. Case, Case-IH, Farmall, International Harvester, New Holland and their logos are registered trademarks of CNH Global N.V.
Yesterday's Tractors - Antique Tractor Headquarters
Website Accessibility Policy