
Hi All,
I've come up with a suggestion to verify the correct timing marks when installing a side mount dist.
Im refering to it as "poof"
While holding a finger over a spark plug hole, watch the rotor, as you turn the starter over. It will "poof" compression past your finger. Your job is to identify the rotor location when it does, and mark it with a sharpy pen. Your mark doesn't have to be perfect, but close. You want to find the group of flywheel marks, with the aprox rotor position. Once you have marks, they time with the cylinder had your finger on.
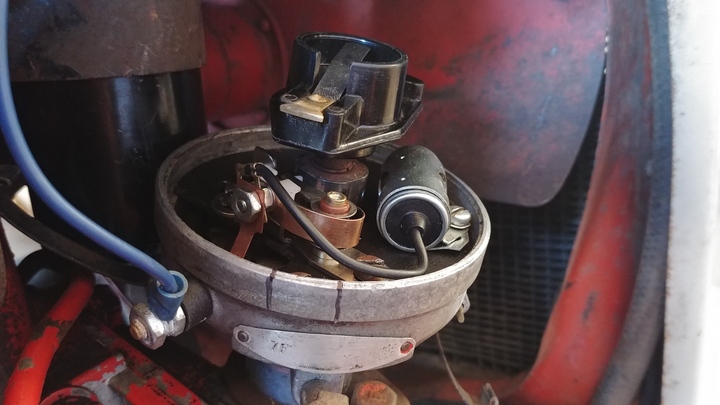
This dist is near #2 , and has two marks on it. I moved the flywheel so the 20 deg mark went out of view, and marked it, then pried the flywheel the other way so the 0 deg was out of view., and marked a second line. So the space between the lines is where the timing marks can be seen.
If your rotor isnt close enough, pry the flywheel up or down a little, or poof again to get a more accurate mark.
Im chuckling as I write about poofing, but it works.
Try it on your 8n, the #2 location is easy to see, its pointing right at you.
Practice helps the learning curve to mark the rotor.
John
I've come up with a suggestion to verify the correct timing marks when installing a side mount dist.
Im refering to it as "poof"
While holding a finger over a spark plug hole, watch the rotor, as you turn the starter over. It will "poof" compression past your finger. Your job is to identify the rotor location when it does, and mark it with a sharpy pen. Your mark doesn't have to be perfect, but close. You want to find the group of flywheel marks, with the aprox rotor position. Once you have marks, they time with the cylinder had your finger on.
This dist is near #2 , and has two marks on it. I moved the flywheel so the 20 deg mark went out of view, and marked it, then pried the flywheel the other way so the 0 deg was out of view., and marked a second line. So the space between the lines is where the timing marks can be seen.
If your rotor isnt close enough, pry the flywheel up or down a little, or poof again to get a more accurate mark.
Im chuckling as I write about poofing, but it works.
Try it on your 8n, the #2 location is easy to see, its pointing right at you.
Practice helps the learning curve to mark the rotor.
John