JJay48
Member
- Location
- Cincinnati, OH
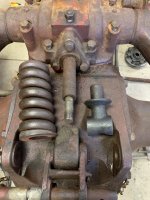
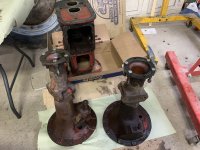
Worked outside most of the day but I did take some time to heat and remove the draft control yoke and plunger spring. I also removed the lift control quadrant. Next ill pull off the lift housing.
My internet is back up.Got the intake valves out this evening. Didnt take a picture but I modified a valve tool and now it looks just like a flathead valve lifter tool. Was able to get the keepers out and then pull out the valves and removed the spring. Then I could pound out the guide.
I also took out the axle on the right side. Going to need a new hub I think as this one is worn. I made sure to note how many shims and where they went.
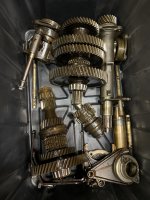
Thanks for the links I will check those out. I need to find some good documentation on the transmission disassembly and reassembly as well.My internet is back up.
Drilling tappet adjustment holes int eh block
My engine is back from the machine shop on my stand, valves built, cam installed and I naively thought I was a quick valve adjustment away from job done... but nope. I upgraded to adjustable tappets and bought the nifty tappet adjustment tools and realized that method is ridiculous. If its...forums.yesterdaystractors.com
adjustable tappet adjusting
I just got my 8N engine block back from hot-tanking and my machinist added a little alteration. He said that the wrenches that you buy for adjusting tappets have a tendency to break, so he drilled a small hole in the housing that holds the tappet. He said I will be able to stick a pin punch in...
holes in lifter guides
The modern adjustable lifter wrenches are junk, I drilled 1/8 holes in the lifter guides and of course drilled them too high. Is there any risk of cracks occurring if I drill new holes about 3/8 in below? The proper placement would have been where the bottom of the hole would be even with the...
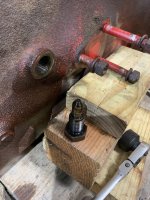
Is that the adjuster bolt out of a tappet ?. I never took one out but have had to free them up. Years ago a bud loaned me his tappet wrenches I broke them and I brought him a new set... Never again I drill them all now. : )Hi JJay48,
Mine broke years ago on the first one. Welded it up. Still no good. Sacrificed a cheap screwdriver. It bent. Welded on the bend to thicken, and got it to kinda work.
View attachment 67786
Drilled blocks worked 100% in my experience. That tappet bolt can take some torque to turn.
If wrenches bend, then what?
Drill with tappets in?
It isIs that the adjuster bolt out of a tappet ?
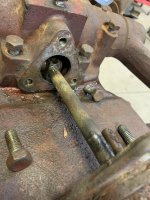
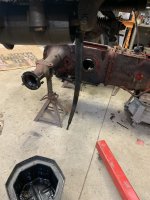
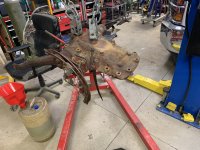
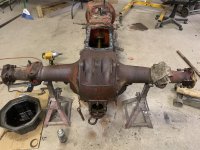
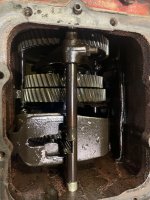
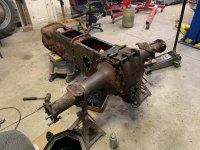
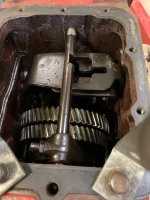
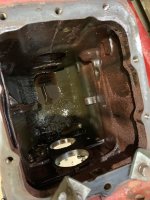
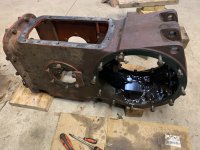
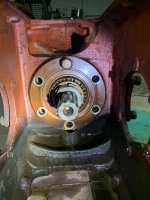
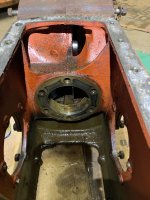
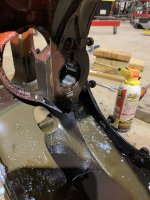
The end of the pinion on the front side has a threaded hole, remove bolts that retain the bearing housing thread a slide hammer in it and pound away.Got the rear diff out this evening. Still need to get the pinion out but it was not coming easily and was getting late. Almost ready to start cleaning everything and getting it down to bare metal.
Thanks! Hopefully it comes out easy enough that way. The bearings on the pinion were actually pretty good still with no slop.The end of the pinion on the front side has a threaded hole, remove bolts that retain the bearing housing thread a slide hammer in it and pound away.
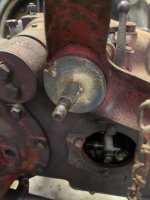
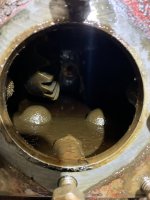
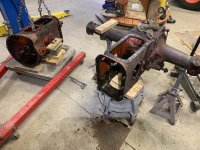
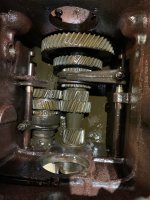
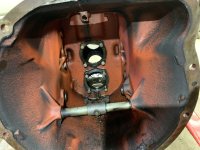
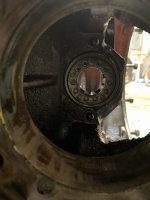
Clean it up if the bearing race looks good leave it be. You can tighten the jam nut and move on with life. On the small bearing I have removed a few I never removed that plate. I would clean it in place if all looks good run it.Ok. So I got it out with the slide hammer and the inner race of the rear pilot bearing came with it. Not sure if that should have happened or would have if I removed the snap ring beforehand. I also noticed the 2 nuts that lock together on the front are loose but there is no slop in the large pinion bearings somehow that I can feel.
Not much info out there on taking one down this far that I can find. Probably need to grind the head off the rivets that hold the oil shield in to get the pilot bearing out. Looking at the new pilot bearing part number it doesnt even look to come with the inner race.
I was planning to redo all the red paint inside the case. Especially since there was none in the gearbox and it was pretty rusty.Clean it up if the bearing race looks good leave it be. You can tighten the jam nut and move on with life. On the small bearing I have removed a few I never removed that plate. I would clean it in place if all looks good run it.
I would clean the transmission housing, trans and the rear parts and move on there is no need to hot tank them. BTW if you hot tank are bake you will need to redo the RED paint.
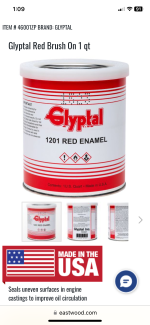
The red coating inside an engine block (all cast housings) is often Glyptal Red Enamel, a thick paint that seals uneven surfaces to improve oil circulation. It's acid- and oil-resistant, and also resists heat, moisture, salt spray, and corrosion. Glyptal 1201 is designed to seal the rough interior castings of engine blocks to help prevent engine damage.
I would have to go look at my case stash, I have never removed that plate, never. The ones I remover were 9n/2N cases I doubt a 8N is made different for that bearing.I was planning to redo all the red paint inside the case. Especially since there was none in the gearbox and it was pretty rusty.
Can the small pilot bearing be pushed out the front then?
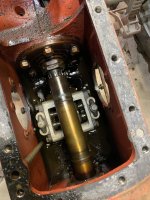
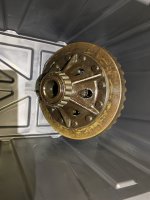
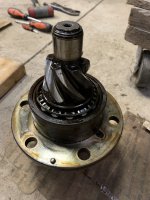
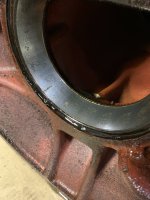
Looks like it sat for a longtime also.I will be replacing diff bearings. Looks like metal shavings must have got in that bearing or something. Probably didnt help either that the axle nuts were loose.
Those are usually caused by water in the oil sitting in between the bearing rollers and the race for an extended amount of time while the tractor sits for a long time unused. Oddly enough the bearing rollers rarely get the same damage as the race and you can get by just replacing the race.I will be replacing diff bearings. Looks like metal shavings must have got in that bearing or something. Probably didnt help either that the axle nuts were loose.
We sell tractor parts! We have the parts you need to repair your tractor - the right parts. Our low prices and years of research make us your best choice when you need parts. Shop Online Today.
Copyright © 1997-2024 Yesterday's Tractor Co.
All Rights Reserved. Reproduction of any part of this website, including design and content, without written permission is strictly prohibited. Trade Marks and Trade Names contained and used in this Website are those of others, and are used in this Website in a descriptive sense to refer to the products of others. Use of this Web site constitutes acceptance of our User Agreement and Privacy Policy TRADEMARK DISCLAIMER: Tradenames and Trademarks referred to within Yesterday's Tractor Co. products and within the Yesterday's Tractor Co. websites are the property of their respective trademark holders. None of these trademark holders are affiliated with Yesterday's Tractor Co., our products, or our website nor are we sponsored by them. John Deere and its logos are the registered trademarks of the John Deere Corporation. Agco, Agco Allis, White, Massey Ferguson and their logos are the registered trademarks of AGCO Corporation. Case, Case-IH, Farmall, International Harvester, New Holland and their logos are registered trademarks of CNH Global N.V.
Yesterday's Tractors - Antique Tractor Headquarters
Website Accessibility Policy