Paul 300 U
Member
My local mechanic was able to remove the lug as discussed in previous post (question 4).
I continued the disassembly, cleaning inserting new parts and reassembling. I am stuck at the last step which is replacing the cover. I was able to fasten the cover once but the shaft would not turn. I tore down the pump and rebuilt to make sure I installed all parts correctly. This time before attaching the cover I turned the shaft and verified the pump is turning freely. When I had the cover part way back on, the shaft would not turn.
It seems the oil seal in thecover is impeding the shaft. I believe I inserted the shaft seal in the right direction but they look different then the originals which were completely encased in metal. The new are open on one side which I believe is the lip side which I installed facing towards the center of the pump.
If that is correct then my question is how far do I insert the seal? I stopped driving them in (using a seal driver) when the exterior metal top of the seal was almost flush with the top of the cover plate. That's how the originals looked. This seal will go further. Do I drive them in as far as possible? Is there another issue I'm missing.
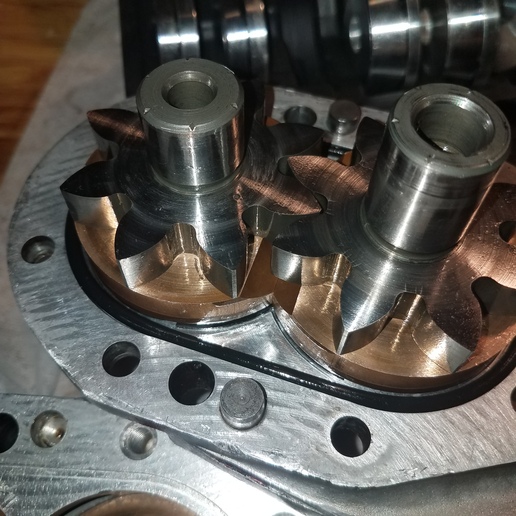
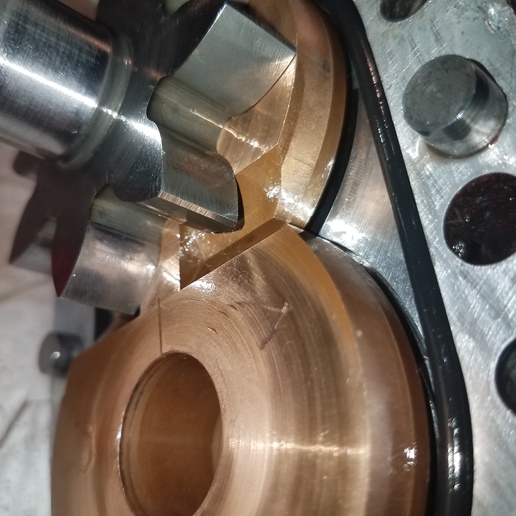
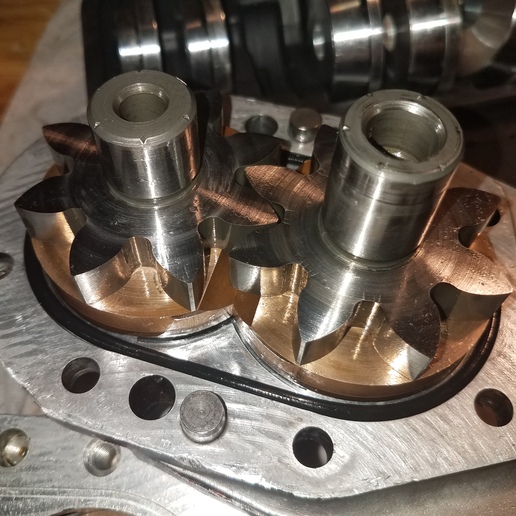
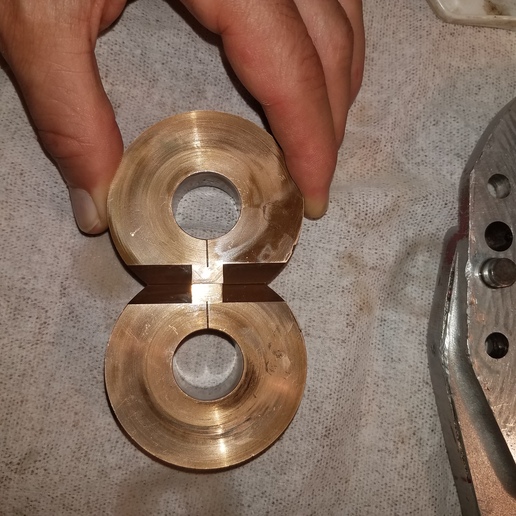
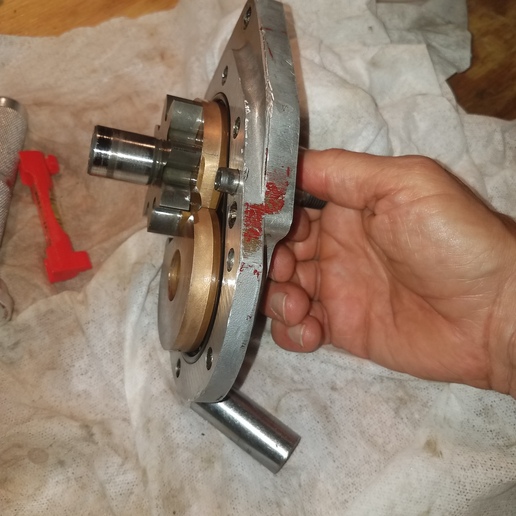
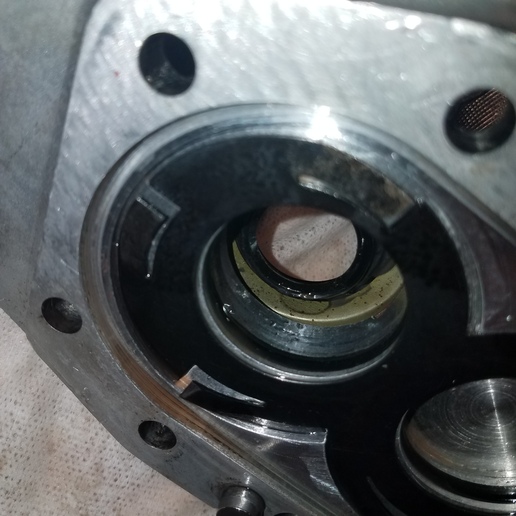
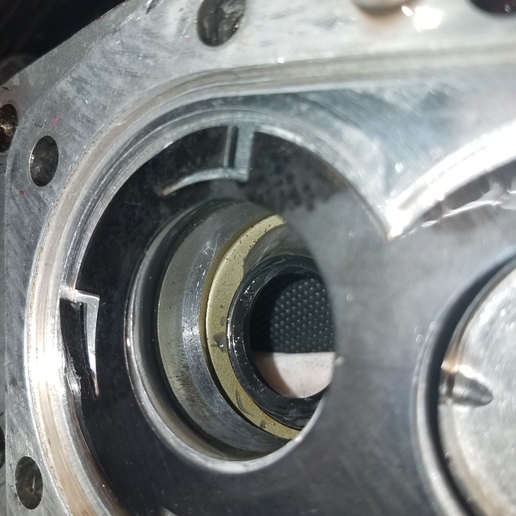
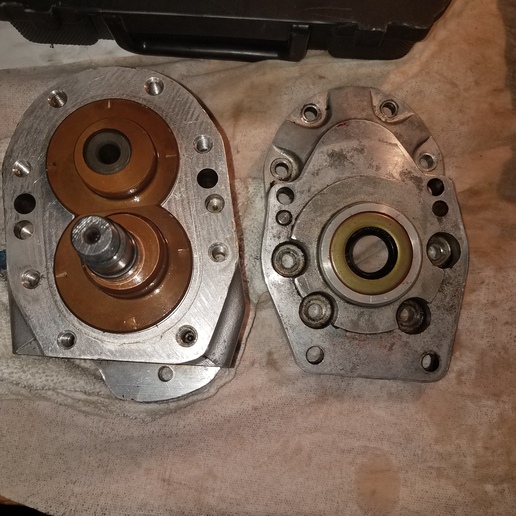
Of course I'm concerned that inserting and removing the shaft is tough on the seal even though I'm being careful. For what it's worth the seal still feels perfectly smooth. Pics show: 1. Seal in question as inserted. (It's now uneven as I was testing whether it would go in further) 2nd and 3rd pic are from the backside. If you zoom you might be able to see remaining room. Pic 4 is just the pump body in case someone notices something incorrect on that side of the equation.
I appreciate the help. Paul

I continued the disassembly, cleaning inserting new parts and reassembling. I am stuck at the last step which is replacing the cover. I was able to fasten the cover once but the shaft would not turn. I tore down the pump and rebuilt to make sure I installed all parts correctly. This time before attaching the cover I turned the shaft and verified the pump is turning freely. When I had the cover part way back on, the shaft would not turn.
It seems the oil seal in thecover is impeding the shaft. I believe I inserted the shaft seal in the right direction but they look different then the originals which were completely encased in metal. The new are open on one side which I believe is the lip side which I installed facing towards the center of the pump.
If that is correct then my question is how far do I insert the seal? I stopped driving them in (using a seal driver) when the exterior metal top of the seal was almost flush with the top of the cover plate. That's how the originals looked. This seal will go further. Do I drive them in as far as possible? Is there another issue I'm missing.
Of course I'm concerned that inserting and removing the shaft is tough on the seal even though I'm being careful. For what it's worth the seal still feels perfectly smooth. Pics show: 1. Seal in question as inserted. (It's now uneven as I was testing whether it would go in further) 2nd and 3rd pic are from the backside. If you zoom you might be able to see remaining room. Pic 4 is just the pump body in case someone notices something incorrect on that side of the equation.
I appreciate the help. Paul