
I realize that these days there are tons of ways to do things but what I'd like to know is a beginners guide to producing a sharp paint job for my tractor without spending a ton...I'm wondering about basic tools such as the sprayer, the air compressor (psi and cfm needed) and the paint type selection and why...dont need a book of info, just the basics. Also hoping that I don't have to put 6 coats and sanding between each to get a sharp look, but, maybe that's required...never done it, but wanna do this in 2011...
You are using an out of date browser. It may not display this or other websites correctly.
You should upgrade or use an alternative browser.
You should upgrade or use an alternative browser.
Joe Strohsack
Member
The best paint for the $ is Valspar Restoration series w/ hardner,and use the correct primer, 2qts red, 2qts gray, 1 gal primer, a shipon type gun will work, Just remember the finish will only look as good as whats under it. #0 years in the paint business and I can tell you the tractor I just completed was thought by many to to be base coat clear coat. you will have about $ 275.00 in paint and primer, by the time your done it will end up $ 500 from Tractor Supply.

Thank you for this. I am looking for an entry point type of list of items to have/use for this...You gave more general info on your very nice outcome. What is the minimum CFM and PSI I need? Is HVLP the way to go? How many coats? Clear coats/# of coats? Sanding?
Tractor bodies are a bugger to paint because of no flat surfaces. Sheet metal and wheels aren't bad at all...I'm figuring no sanding on the body, not practical except some ares of the pan...the hood/fenders/doglegs are very easily sandable, if needed...
Tractor bodies are a bugger to paint because of no flat surfaces. Sheet metal and wheels aren't bad at all...I'm figuring no sanding on the body, not practical except some ares of the pan...the hood/fenders/doglegs are very easily sandable, if needed...
You don't have to spend a fortune unless you want to. I did mine as cheap as possible and I think it looks pretty good. I cleaned everything as best I could, got 2 quarts of Ford gray from TSC and a gallon of Rustoleum Safety Red From Home Depot. 100 % brush job. But it's your tractor. Spend as much as you want.
photoshop text
 [/img]
photoshop text
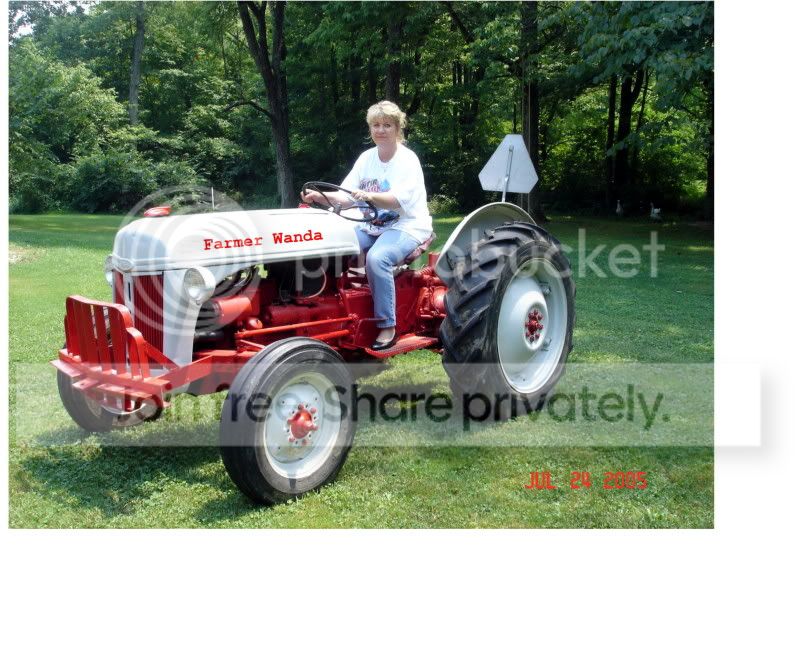
Here is one I did, and probably as inexpensively as possible. This is using Rust-Oleum quarts of Sunrise Red (from Wal-Mart) brushed on, then hit with rattle cans to flow it out on the cast parts. Sheet metal is Van Sickle Ford Grey. Basically I removed sheet metal, and cleaned everything really well, then brushed one section at a time using the rattle can to get rid of brush marks. Probably $200 total in the job including paint, any sand paper, wire wheels, etc. Not show quality, but the tractor went straight to the field, and I am not afraid to scratch it in the brush either, and easily touched up with a spray can if the need arises. This took me a month including time to split the tractor and repair clutch, radiator, and some other misc parts that needed attention. This was done evenings mostly. Just showing what you can do on a tight budget, yet look good at 20 feet away or 20 mph. (I call it a 20/20 paint job).
My son got a book on tractor restoration written by a guy who is semi retired and doing restorations professionally. The guy says in his book to get a cheap paint and primer and do the hood first. If you goof it up sand it and try it again until you get it right. Then sand it a final time and apply a better quality paint.
As far as guns most people will tell you what they like best. Make your choice and then read what the manufacturer says is the CFM and pressure requirements. Remember what is listed is max and most systems can run a bit under that and get good results. Your compressor needs to deliver at a constant flow at minimum what the gun calls for. You will also need a "filter system that removes moisture from the air and unless it's built into the compressor a regulator to reduce pressure. I use a siphon type gun. I have 2 compressors. On large 70 gal tank 7 hp that delivers all the air I can use. The other is a contractor portable with a built in regulator. The small one is plenty big enough for a paint gun. My gun has a max of 45 PSI and a low CLF rating. My gun is a cheap one. My son in law has a $200 gravity feed that requires even less air. I'm going to try his out this spring!
Rick
Spray painting can be hazardous to your health if you don't use the proper breathing equipment. Most hardeners will put you in the hospital if you don't wear the correct mask. Even breathing the over spray from rattle cans can knock you on your butt. If you have never spray painted before get a book or better yet ask a buddy that knows how to paint to help you. If your tractor is going to be a worker a brush job is good enough in my opinion. I purchased all the equipment, had a friend show me how to do it and still had a mass of runs in the sheet metal. Some things I just can not do correctly.
G6 at Snook, TX
Well-known Member
Call external_link and sound them out about their process. They seem to know their stuff and if the photos and rep mean anything, their painting process should be good too. I am certain that they will sell it to you as well if you are interested.
Good luck.
Good luck.
Joe Strohsack
Member
I see in my previous post it read 0 years where it should have said 30 years in the business, it all comes down to this, it yours and if your happy, that all that matters. If you want a show type paint job, you just might as well get some to work with you side by side that has experience, or pay someone to do it for you, you just might be futher ( $$$ ) ahead. If I can help anymore shoot me an E- Mail and I can give you my phone # [email protected]
T.D.From Iowa
Member
You can do it. You have some excellent post to go by here. the key is to get it clean, and ready to paint. When you have it cleaned spend another night cleaning. I used tisco paint on mine and although its not showroom I like how it turned out.Remember you can paint it any color under the rainbow because its your tractor.
William Fissell
Member
How much work do most folks do in removing old paint?
What do you do to old paint to get it to accept new paint?
My Jube has about 4 colors of red under each other, and somene painetd the brake pawls so much they are stuck until I burn the paint off.
What do you do to old paint to get it to accept new paint?
My Jube has about 4 colors of red under each other, and somene painetd the brake pawls so much they are stuck until I burn the paint off.
Ed S.
Well-known Member
- Location
- Middle Tennessee
Prep *is* everything in a good paint job... take the time to prep well, and you can hit it with rattle cans and get a decent looking finish that will last for years. Don't prep well, and even the best quality paint will fail quickly.
Once you decide how thorough a job you're going to do (take it completely apart vs. minimal disassembly), you'll start by removing paint, dirt, grease, etc. Note that if your current paint is not chalky, flaking or rusted, you could possibly get away with lightly sanding and painting right over what you have.
However, most 60-year-old tractors won't fall into that category. Mine surely didn't.
I used a combination of strippers (from oven cleaner to aircraft stripper) on the large cast parts, and made a CHEAP electrolysis tank to remove paint from the smaller parts.
Some parts had four and five layers of paint on them (including latex house paint). Once done with strippers or the e-tank, everything got spritzed with phosphoric acid (available at your local big-box lumber store as concrete etcher) to stop the flash oxidation (surface rust) that starts immediately once the metal is exposed - it's not a long-term solution, but will hold you for a few weeks if you're not too humid.
I then came back with an angle-grinder and a cupped wire-wheel to clean away any remaining cruft. Then used lacquer thinner to wipe any remaining grease from the surface and once dry, used a 3" brush to apply red oxide primer, or rattle can primer for some of the smaller parts.

BTW - make sure you are using the same type of primer as top coat - enamel and lacquer don't mix well... Also use proper personal protective equipment (safety glasses and gloves while wire brushing, good ventilation for the e-tank since it generates hydrogen gas, etc.).
I built the tractor back up as I completed the painting and other refurbishing work...

Once all the "red" parts were together, I lightly sanded the primer to scuff it up a bit so the topcoat would stick better.
I then mixed up Rustoleum Sunrise Red with Valspar hardener (per instructions on the cans) and shot two coats with my ancient spray gun. I have an equally ancient 30 gallon compressor (don't know the HP, but it's not that much). If you've never used a spray gun on a compressor before and that's the route you go, find something else to practice a bit on first. Too much air and you get a lot of dry overspray and early paint failure. Too little, and you get a sputtery, runny mess. Google around and you'll find info on proper technique.

Did basically the same process for the "grey" parts (two coats), but with a bit more sanding out of the primer before topcoat:

I used rattle cans for the trim colors (black, gunmetal grey on the exhaust):

Finished putting it together, and went for my first drive!
Hope that's of help. More pics are here.
Note that there are certainly other paths to get to a nice finish - this is the one I took, largely driven by available tools, experience and skill level...
es
Once you decide how thorough a job you're going to do (take it completely apart vs. minimal disassembly), you'll start by removing paint, dirt, grease, etc. Note that if your current paint is not chalky, flaking or rusted, you could possibly get away with lightly sanding and painting right over what you have.
However, most 60-year-old tractors won't fall into that category. Mine surely didn't.
I used a combination of strippers (from oven cleaner to aircraft stripper) on the large cast parts, and made a CHEAP electrolysis tank to remove paint from the smaller parts.
Some parts had four and five layers of paint on them (including latex house paint). Once done with strippers or the e-tank, everything got spritzed with phosphoric acid (available at your local big-box lumber store as concrete etcher) to stop the flash oxidation (surface rust) that starts immediately once the metal is exposed - it's not a long-term solution, but will hold you for a few weeks if you're not too humid.
I then came back with an angle-grinder and a cupped wire-wheel to clean away any remaining cruft. Then used lacquer thinner to wipe any remaining grease from the surface and once dry, used a 3" brush to apply red oxide primer, or rattle can primer for some of the smaller parts.
BTW - make sure you are using the same type of primer as top coat - enamel and lacquer don't mix well... Also use proper personal protective equipment (safety glasses and gloves while wire brushing, good ventilation for the e-tank since it generates hydrogen gas, etc.).
I built the tractor back up as I completed the painting and other refurbishing work...
Once all the "red" parts were together, I lightly sanded the primer to scuff it up a bit so the topcoat would stick better.
I then mixed up Rustoleum Sunrise Red with Valspar hardener (per instructions on the cans) and shot two coats with my ancient spray gun. I have an equally ancient 30 gallon compressor (don't know the HP, but it's not that much). If you've never used a spray gun on a compressor before and that's the route you go, find something else to practice a bit on first. Too much air and you get a lot of dry overspray and early paint failure. Too little, and you get a sputtery, runny mess. Google around and you'll find info on proper technique.
Did basically the same process for the "grey" parts (two coats), but with a bit more sanding out of the primer before topcoat:
I used rattle cans for the trim colors (black, gunmetal grey on the exhaust):
Finished putting it together, and went for my first drive!
Hope that's of help. More pics are here.
Note that there are certainly other paths to get to a nice finish - this is the one I took, largely driven by available tools, experience and skill level...
es
Not to try to take away from the topic, but Ed's post got me wondering. I am wondering if any of the mfg's primed the older tractors prior to paint? I do not believe IH did, and did not find primer on my 8N, although it could have been grey or red primer, and not readily noticable. I have read where others do not prime, and I did not prime my 8N, even though it was not entirely down to bare metal. I prefer to leave as much paint as I can to avoid rust starting, and when I do take down to bare metal I try to hit it as soon as possible with some paint if I can. So far no ill effects from no primer after about 4 years since I painted on my 8N.
Joe Strohsack
Member
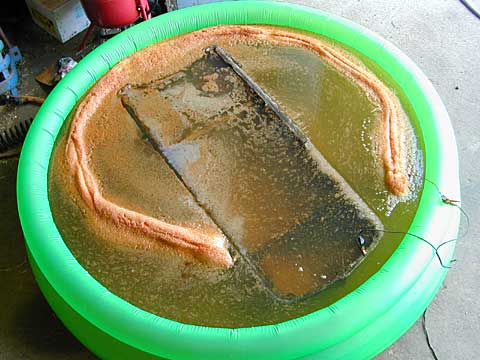
Lot of questions on how to prep the tractor, soda blasting works great, or if your compressor is big enough, sand blasting worked best for me. Les than $100 in sand, and about 1 1/2 hours.
DollarBill
Member
[b:7db59fca16][color=darkred:7db59fca16]I'd like to know is a beginners guide to producing a sharp paint job for my tractor without spending a ton.[/color:7db59fca16][/b:7db59fca16]
One thing to keep in mind: Everything comes with a price - An extremely high gloss, durable paint job will require the right equipment, experience and expensive materials. Most people don't have these agendas when painting their tractor.
As others have mentioned, preparation is probably 80% of the final outcome.
Let your wallet determine how much you spend on painting equipment - Just keep in mind how much use it will get after your tractor is done.
Your call, but I would get comfortable shooting with a spray can before spending the coin for the paint equipment you mentioned. Contrary to what others tell you, you can get a good paint job from rattle cans.
I worked in a body shop in the 70's and mastered the technique of painting with lacquer and enamel and have even painted a few cars with good results. I have several paint guns and a big compressor and still painted my tractor with a spray can - I liked the convenience of painting each part as I went rather than paint the whole assembly. To keep a paint gun in good condition, it must be kept scrupulously clean otherwise it will give you problems.
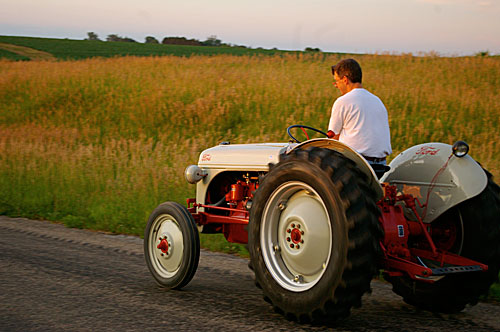
Here's my tractor with a few items remaining but just to give you an idea of the outcome:

I used used Rustoleoum Sunrise Red and Tisco Ford Medium Gray.
DollarBill
Member
Nice looking tractor, do you use the Howard?
Thanks!
Funny story about the Howard. I didn't know it was there until I pulled the lift cover. The Howard side cover was there without the handle so I figured someone swapped the orig side cover for this one - The stub would spin without any tension so it appeared not to be connected to anything.
To answer your question - No I don't have a tiller and Ms. Daisey's working days are behind her.
Well I got a lot of replies but not much detail...looking for some more detail on what paint to use and why, # of coats, sanding, clear coating, etc...I'm looking to do a very nice paint job, but, not really sure if I'm asking for show quality...20-20 rattle cans is ok butt, I'd like to step it up a notch...
Your posted questions have certainly had a good response not only in advise but also in pictures of other YT members tractors, enough to make any lover of the Ford "N" series tractors mighty envious.
But to the point, I have done business with a company that sells auto restoration equipment and tools, paint, body parts, power tools etc. I found them to be fair in price with excellent painting equipment and great with helpful restoration information.
I would reccommend that you call and request their latest catalog before going any further. Doing so may be very helpful in your project
Good Luck, Scott
Eastwood (repair restore revive)
800-345-1178
www.eastwood.com
Eriklane........"One thing to keep in mind: Everything comes with a price - An extremely high gloss, durable paint job will require the right equipment, experience and expensive materials. Most people don't have these agendas when painting their tractor"........pay attention!!!
What yer asking fer is mutually exclusive, show quality ...or... useable protection.
Heres what I recommend: oilbased enamel of yer choice (use the HARDNER type iff'n you obey breathing SAFETY rules) and short nap ROLLER for yer HOOD and fenders. Since yer eyeballs are always on yer hood, lightly MIST the wet roller paint with spray bomb, should only need 1-can. The mist will smoothout enny roller nubbies and please yer eyeballs later when driving yer Tractor Queen.
I recommend using BRUSH on the castiron engine works and NO THINING of the paint. You will gitt a longer lasting paintjob and castiron won't show brush strokes. ........Dell, yer 20/20 painter
Ed S.
Well-known Member
- Location
- Middle Tennessee
(quoted from post at 09:09:38 12/28/10) Well I got a lot of replies but not much detail...looking for some more detail on what paint to use and why, # of coats, sanding, clear coating, etc...I'm looking to do a very nice paint job, but, not really sure if I'm asking for show quality...20-20 rattle cans is ok butt, I'd like to step it up a notch...
You did indeed get advice on what paint to use... based on what others, including myself, have used and had decent results with. An oil-based enamel will give you a nice finish, and is fairly easy to work with and won't kill you as quickly as some of the other more expensive options...
At the risk of repeating myself, Rustoleum Sunrise Red is a fairly close match for the original red color, and can be mixed with a Valspar hardener for a durable, easy to apply finish. I used "Ford Grey" from TSC for my tin, but ended up tinting it a bit (using Rustoleum black and yellow from a can) because I didn't think the color matched as well as it could.
No clear coat is required with the enamels...
Sanding is part of your prep work - do as much or as little as you think is needed to get a nice finish.
es
As far as sanding between each coat goes go look at what the body shops are doing. They sure are not putting 6 coats on with a sanding between each coat unless it's a very expensive custom job. They apply one to two coats as needed then if necessary cutting and buffing it out. Keep in mind that they are using paints that set up almost as fast as they are spraying it so they get a thicker coat of paint on per pass. Thats what the guys telling you about using a hardner are talking about. Some dry fast enough that it's touch dry in abour 15 min and can be handeled after 3 or 4 hours.
I'd say get an old hood from a wrecking yard, sand it down and experement on that. Spray with it laying flat and leaned up on something both so that you can learn just how to set up the gun and apply paint.
Rick
We sell tractor parts! We have the parts you need to repair your tractor - the right parts. Our low prices and years of research make us your best choice when you need parts. Shop Online Today.
Copyright © 1997-2025 Yesterday's Tractor Co.
All Rights Reserved. Reproduction of any part of this website, including design and content, without written permission is strictly prohibited. Trade Marks and Trade Names contained and used in this Website are those of others, and are used in this Website in a descriptive sense to refer to the products of others. Use of this Web site constitutes acceptance of our User Agreement and Privacy Policy TRADEMARK DISCLAIMER: Tradenames and Trademarks referred to within Yesterday's Tractor Co. products and within the Yesterday's Tractor Co. websites are the property of their respective trademark holders. None of these trademark holders are affiliated with Yesterday's Tractor Co., our products, or our website nor are we sponsored by them. John Deere and its logos are the registered trademarks of the John Deere Corporation. Agco, Agco Allis, White, Massey Ferguson and their logos are the registered trademarks of AGCO Corporation. Case, Case-IH, Farmall, International Harvester, New Holland and their logos are registered trademarks of CNH Global N.V.
Yesterday's Tractors - Antique Tractor Headquarters
Website Accessibility Policy