First, check out tip # 39. A complete set of manuals for the tractor will save you a lot of time & money.
Next, is it 6v or 12v? If it's 12v & you don't have the correct resistors in the circuit, you are just chasing your tail.
If it's 6v, all it needs is the OEM ballast resistor on top of the terminal block.
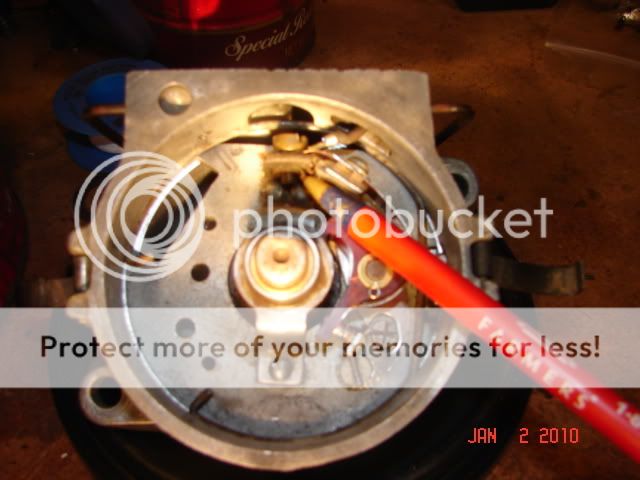
The front distributor was designed to come off of the tractor to replace/adjust the points. Remove the wire on the coil, remove the coil bail, remove the distributor cap & take the two bolts off. The base of the distributor has an offset tang & can only go back one way unless you really force it on. Look at how the points & condenser set in the distributor before you start pulling it down! Turn the tang & observe how the points open & close. If this is your first time doing it, draw a sketch!. Make sure you are using quality parts; the points should have a phenolic rubbing block & not the cheap white plastic crap. Use only Wells, Blue Streak or Echlin brand points. (* see below) Be careful not to ground the tip of the condenser wire to the body of the distributor when you replace the points. Do not break the little copper strip that goes to the points. (If you do, make another out of the old set of points) Also, make sure the condenser wire does not go through the same opening in the distributor that the coil pig tail does. The condenser wire goes the opening on the top right. Look at the old points; are they burned, pitted or mis-aligned? Check the point gap, .015 on all four lobes. Make sure the blade is at a perfect right angle to the points & you want to feel just the slightest bit of drag when you pull the blade through the points. Set the points on the highside of the cam. Make sure you have the star washers under the screws on the points. Dress the points by running a piece of card stock or brown paper bag through them. New points sometimes have an anti-corrosive dielectric coating on them & old points can corrode or pick up grease from a dirty feeler gauge or excessive cam lubricant. And, don’t forget to lube the rubbing block w/ cam lube; not Vaseline, not bearing grease, but cam lube. (** see below)
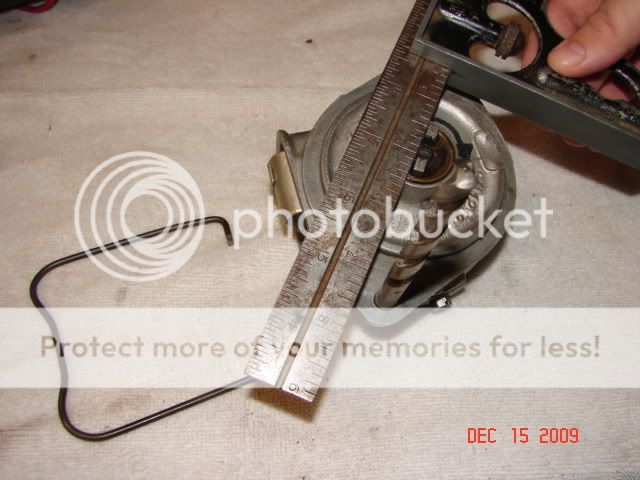
Now, set the timing. Get a meter or test light, a 21/64” drill bit & a metal straight edge. Put the distributor face down w/ the condenser on the left & the timing plate lock screw on the bottom. Look at the end of the shaft: it has a narrow side & a wide side. Make sure you can tell the difference. Now, place the drill bit in the bottom mounting hole. (this will be your reference point for measuring) . Next, place a straight edge on the wide side of the tang on shaft as shown in fig. FO83 in the I&T FO4 manual. Rotate the shaft CCW (as viewed from rotor side OR CW as viewed from back/tang side) until the straight edge is ¼" beyond the outside edge of the drill bit you stuck in the distributor mounting hole. At this distance, the distributor points should start to open. (get your meter/light out now & check) If not, loosen the timing plate lock screw and turn to advance or retard the timing. (move the plate down to advance timing, up to retard) Remember, each one of those little hash marks represents about 4* of timing. Keep adjusting until you get the proper ¼" setting. (if the plate won’t move, you might need to remove the big C clip to loosen it a bit) As you’re adjusting, eliminate backlash by turning the shaft backwards (CW as viewed from the front) and bring the shaft forwards (CCW as viewed from the front) to measure your setting. This ¼" setting will get you static timing at top dead center.
After you set the points & timing, do a continuity check before you put the distributor back on the tractor. Before you start, make sure your meter/light works (don't ask....)
With the distributor still off the tractor, follow these steps:
1. Coil off, cap off, points open. One probe on the brass screw & the other on both sides of the open points. On the side closest to the cam, you should have continuity. Not on the other side! If you do, you will also have continuity everywhere because the points are grounded.
2. Coil off, cap off, points open. One probe on the brass screw & the other anywhere on the body of the distributor. You should have no continuity! Now, rotate the tang on the distributor....as the points open & close, you have continuity (closed) and lose it when they open.
3. Put the coil on the distributor, cap off, points open. One probe on the lead on the top of the coil, the other on the cam side of the open points. You should have continuity!
4. Coil on, cap off, points open. One probe on the lead on the top of the coil, the other anywhere on the body of the distributor. You should have no continuity!
At this point, I just put the distributor, coil & cap all back on the tractor as a unit (it’s easier to do this from the left side). The reason I do this is because it is real easy to get the cap or coil mis-aligned trying to put it back together one piece at a time & the result is something gets broken or you get a ‘no spark’ problem. It's possible to put it back on wrong & break it.
Look at the slot on the end of the cam shaft. What ever angle it happens to be, turn the distributor tang to match it. (close counts)
Then place the distributor on the front of the engine, gently push it in place & slowly turn the distributor body until you feel the tang slip into the slot. Rotate the distributor body until the bolt holes line up. Then, hand tighten the two bolts until the distributor body is flush w/ the timing gear cover.
Post back w/ results & any other questions.
* NAPA part numbers:
· Points: FD-6769X
· Condenser: FD-71
· Rotor: FD-104
· Cap: FD-126
** Distributor cam lube: http://www.autoanything.com/fluids-manuals-63-771-1978/201A1960.aspx?kc=FFPMM
50 Tips