JJay48
Member
- Location
- Cincinnati, OH
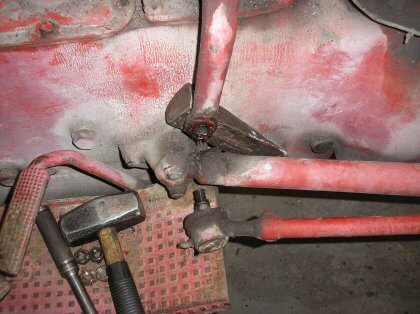
Thank for the link!Pics of removing drag links, tie rods
Thank for the link!Pics of removing drag links, tie rods
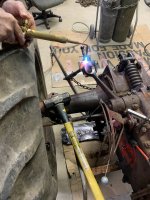
Leave that pickle fork for ends that are worn out you are you never gonna use again its a last resort. Those ends pop right off put the nut on drive a wedge between the nut and case then hit the arm with a BFH nuttin to it. I use a pick ax cuzz I don't have a splinting wedge. Its in this link.Yeah, I was just trying to save on them for now. I have a bearing puller that might work.
Leave that pickle fork for ends that are worn out you are you never gonna use again its a last resort. Those ends pop right off put the nut on drive a wedge between the nut and case then hit the arm with a BFH nuttin to it. I use a pick ax cuzz I don't have a splinting wedge. Its in this link.
Maintenance & Repairs - Ford Fordson Collectors Association
By: John Smith of Old Ford Tractorsfordtractorcollectors.com
Not everyone has a GOOD air hammer. Getter done. If those pins put up a fight I either cut them are drill them 3/4 of the way thru then a punch bit in a air hammer in the drilled hole to drive them out. Those pins drill out easy.I used an old nut only the steering ends and the air hammer like I usually do on cars. Comes right off and doesnt damage anything. On the steering box side I just removed the whole box and then was able to get to the back side and use the air hammer.
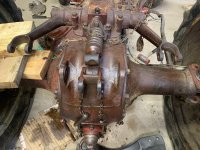
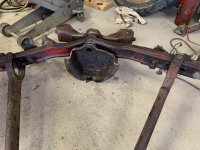
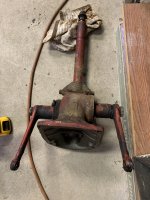
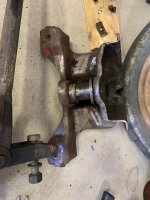
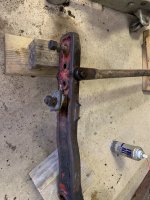
I got the radius arm pins out today. One fought me hard and took a lot of heat. The other side came right out with the air hammer and no heat. The center front axle pin also came right out with a socket from the back side.
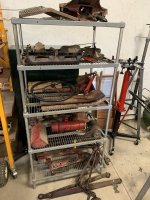
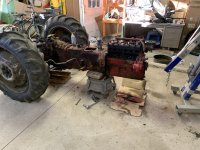
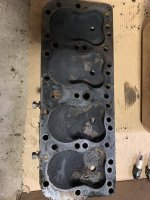
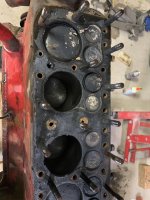
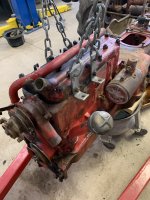
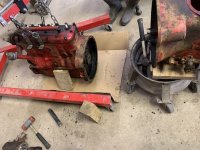
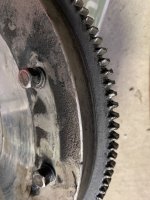
I am ready to pull the motor and get it cleaned up now. Most of the parts I got stacked on a shelf and ready to clean now.
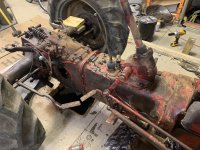
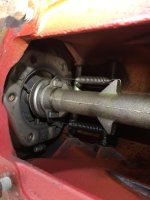
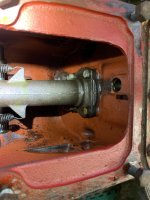
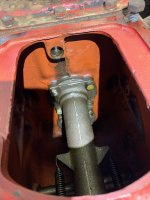
My dad said the hydraulics were really weak last time it ran. I was looking at the position arm while moving the lever with it in the draft control position I could see the arm moving. With it in the up position control and moving the lever up and down I dont see the arm move at all. Something wrong in the lid im sure?
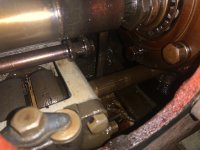
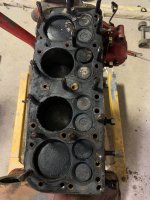
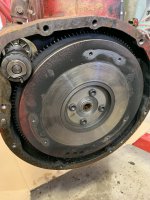
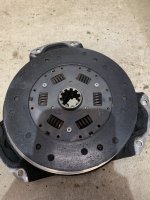
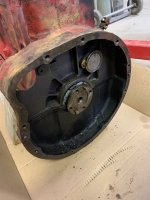
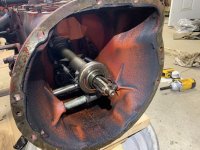
One more thing. Does it look like I have a leak from the trans into the clutch section? Not sure what that pin is near the top on the back side towards the trans. Over all it looks clean in there though.
Haha I know what you mean. I just heat it and beat it till it starts to move and then I took the whiz wheel and ground away the sides where it was mushroomed and then pounded it on through.Sometimes all the time for me all that heat and beating swells the pin the fight is on.
Let me know when you start a thread and I will check it out.My new-to-me '48 is in pieces, as well. Heat and hammer; things eventually came apart without damage. I will start a thread on it in a couple of weeks. Other things to take care of first. zuhnc
Thanks for the pics. I will be doing the same this fall with my 8N51. I will be curious to see the pics of the engine rebuild when you get there.Got the pins out of the lift arms today. They did not come out without a fight. Had to heat them with a torch and soak in penetrating fluid multiple times along with using the air hammer. Also got the hydraulic fluid drained, removed the access covers, and the dash is off. Tomorrow ill remove the lift plate and pump and hopefully get the axle nuts loose.
I still need to get that draft spring off the top lid. Im sure more heat is needed. Does it just unscrew?
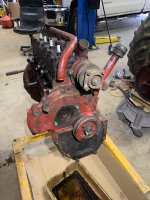
Ahh good catch on that. I forgot about it but Ill fix it later.I can not tell good by the pix, you need to improvise away to hold the engine without bolting the stand to the pan. I cut a mount out of 1/4" steel plate that bolts to engine block only it gives me access to the rear of the crank along with removing and installing the oil pan while on the stand. I made my crank turning toll out of a old front crank pulley.
I am in Cincinnati, Ohio. I am not sure what warm compression is because it would not run good so it sat a long time. Its the original engine thats never been opened. I want to refresh it while I have it all apart of course. I was going to get a leak down tester and check that as well but figured I want to rebuild it no matter what.What does it currently have for compression and oil pressure? It may not need a rebuild at all. If it does need a rebuild I agree with taking the core parts to a machine shop for cleaning and evaluation. They will tell you there what needs to be done in order to meet your objectives. They can also source the pistons rings bearings, sleeves etc. because they have sources that us here at YT could not even dream of. They can save you $ on your parts too. It is also good when the parts that you have purchase actually fit the crank, block, etc. buying from one source makes this more likely. If you were to share your location you would probably get references for a half dozen good shops within an hours drive.
My dads cousin works at a transmission shop and can probably clean the block and head for me. I ordered some snap gauges to measure the rod ends and I already have a digital caliper. I will probably get some adjustable lifters for it and new sleeves and piston rings. Of course all new gaskets.
Use micrometers on the journals.
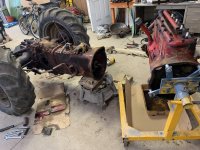
If it won't run well on a 6v system,converting to 12v won't make it magically run better. My '41 9n runs great on 6v,starts easily and performs well. As said already,check the front mount distributor's timing.Just started tearing down my 8n Sunday evening that originally belonged to my grandpa who bought it brand new. I wanted to start this thread because I will have many questions a long the way.
Its going to need many new parts but has great bones to start with. Many of the parts are in great condition and just need cleaned up and painted. I will buy all the parts I can from yesterdaytractor but if another company sells a certain part that is preferable to the one sold here that would be nice to know. I currently have many parts in the cart for the cooling system.
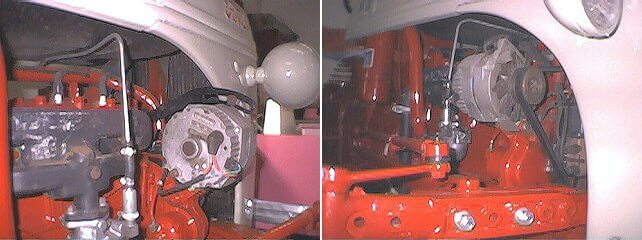
The stock 6v wiring was in bad shape. I think I have settled on converting it to 12v for ease of battery maintenance and working with my charging systems and jumpers. Plus I want to clean things up with the 1 wire alternator.
Question 1: Who makes the best 12v conversion kit?
I watched a YT video about the conversion and the guy mentioned another site had a nice kit and he liked how their adjusting bracket was curved. I have not noticed this though looking at the parts photos.
Question 2: Which Engine rebuild kit?
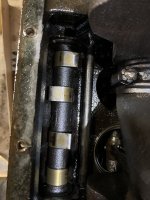
I want to pull apart the engine and replace all the gaskets and do a valve job. While I am in there I think I should at least replace the rings and possibly just re-sleeve it. I have read about adjustable lifters that allow the valves to rotate. Which kit would be good to go with for the engine rebuild. I want to make sure I get some good replacement valve springs with the correct seat pressures.
Might take the engine to a machine shop if I can find a trust worthy one as it would be nice to have it hot tanked and the head/deck surfaces checked. Not sure how crucial that is with the flat head engine though because most seem to skip this step.
Question 3: What service manuals get the most detailed with specs and directions for the rebuild? I currently have the I&T shop service manual.
I will post up some photos soon.
Thanks
We sell tractor parts! We have the parts you need to repair your tractor - the right parts. Our low prices and years of research make us your best choice when you need parts. Shop Online Today.
Copyright © 1997-2024 Yesterday's Tractor Co.
All Rights Reserved. Reproduction of any part of this website, including design and content, without written permission is strictly prohibited. Trade Marks and Trade Names contained and used in this Website are those of others, and are used in this Website in a descriptive sense to refer to the products of others. Use of this Web site constitutes acceptance of our User Agreement and Privacy Policy TRADEMARK DISCLAIMER: Tradenames and Trademarks referred to within Yesterday's Tractor Co. products and within the Yesterday's Tractor Co. websites are the property of their respective trademark holders. None of these trademark holders are affiliated with Yesterday's Tractor Co., our products, or our website nor are we sponsored by them. John Deere and its logos are the registered trademarks of the John Deere Corporation. Agco, Agco Allis, White, Massey Ferguson and their logos are the registered trademarks of AGCO Corporation. Case, Case-IH, Farmall, International Harvester, New Holland and their logos are registered trademarks of CNH Global N.V.
Yesterday's Tractors - Antique Tractor Headquarters
Website Accessibility Policy